
By Terry Miesle - images & text © 2003
|
![[Click to enlarge]](tm_Ogre6step19.jpg) |
|
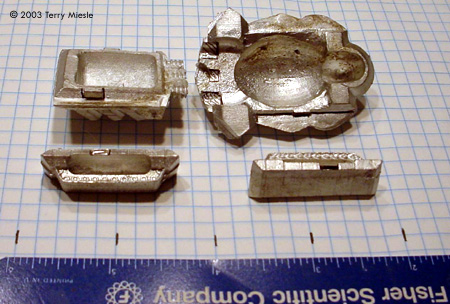
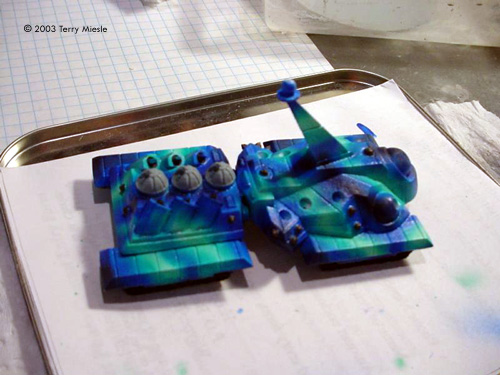
Image: Back sides of the main parts |
The Mk. VI Ogre is big. No, strike that, it’s FRIGGIN HUGE. By far the largest Ogre ever released for Steve Jackson Games’ tabletop wargame Ogre, the Mk. VI is as close to a land battleship we’re ever likely to see. The Mk. VI is a long time in coming, as SJ Games has decided to get out of the miniatures business, and has farmed out the production of Ogre miniatures, the only miniature line which they will continue to offer. I invite you to view my Mk. IV review or SJ Games' Ogre Mk. VI page for a background of Ogre. The Mk. VI miniature is 3.5” (9cm) long, 1.75” (4.5cm) wide and 1.75” (4.5cm) tall. It sports three main batteries, six secondaries, six external missiles and three missile racks with four missiles apiece. Sixteen antipersonnel batteries ensure those pesky powered infantry stay away for a good long time, as well. So, what do you get for your $20? A very good value, compared with many other miniatures. Two hulls, three sets of main/secondary guns, the distinctive Ogre sensor tower, and four tracks. As I mentioned, it’s BIG. In the comparison picture, you’ll see the Mk VI, a Mk. III, a superheavy tank and a medium tank. The quality of casting on my review copy is very good, with few casting gates and no flaws. There have been a number of construction improvements compared with the Mk. IV I built some time ago, I’ll detail those now. First and foremost, the tracks now attach with broad, flat areas and a positive notch. This is much better than the peg-and-hole method on the Mk. IV. They fit perfectly. The joint between primary and secondary hulls has also been revised. It’s now deeper and has a great deal more area for gluing. I will still apply an amount of epoxy putty to reinforce this joint, however. The hulls and tracks seem to fit flat and true when placed on the tabletop. All things considered, Richard Kerr’s sculpting is outstanding. The design is more ornate than previous Ogres, the sense of size is impressive, and the quality of assembly is excellent. You will be well-pleased with your purchase. Assembly and Painting The first thing I always do with metal miniatures is wash them. If the parts are large enough, it can go in the dishwasher - which does a greatjob. If not, or if I'm not planning on filling the dishwasher soon enough, a toothbrush and dish soap has to suffice. Metal minis always seem to have some sort of mold release which interferes with painting. |
|
Next, it's time for cleanup. All the little vent gates, flash etc must be trimmed. Mold lines and irregularities must be filed off. The Ogre VI was pretty clean, nothing out of the ordinary was found. Next, I rinse the mini to remove any metal shavings from filing.
Most of the time this will use superglue, but sometimes epoxy is best. The ogre required only superglue. Hull halves first, then tracks, then the tower. All guns were left off at this point, as they only get in the way while painting. I did take the precaution of placing a quantity of epoxy putty. You can see this provides something of an arch support, and is sculpted to look like the bottom portion of the flexible link between hull halves. The assembly of this particular Ogre was particularly easy. I had mentioned in my review of the Mk. IV a few problems with the tracks and link between hull halves. Those have been completely resolved in this kit. It's really very good, and didn't require any adjustment or rework. I'm highly impressed. Painting Prep I have started to use Gunze-Sangyo's Mr. Surfacer 1000 for a primer. I find it doesn't obscure details as long as it's thin enough. It also bonds to the metal very well. I've also used can primers, but I like the smooth surface of the Mr. Surfacer. I did find a couple of pits which needed to be addressed. I used Mr. Surfacer 500 to fill these little pits, and wet-sanded the area smooth. Once that has dried two days, I spray a flat white primer from a can. This doesn't have to be perfect, but it does lighten the surface for better color resolution. I wanted this Ogre to have a very unusual paint job. I had been thinking of an aquatic/shoreline camouflage for a while, and thought this would be a good subject. Not that camouflage on a behemoth like this is all that useful, but it looks good. I’ve been using Reaper Pro Paints on minis for a little while, ever since my buddy Phil at Reaper sent me some samples. They ’ve got a good range of paints, and are pretty versatile. I thin them with Windex (ammonia-containing window cleaner) until the viscosity is right. I think that I add about 30% Windex. One note, the Reaper paint will build up on your airbrush needle. I keep a small jar with a nylon brush and water to remove this buildup. |
![[finished product]](tm_Ogre6step19a.jpg)
|
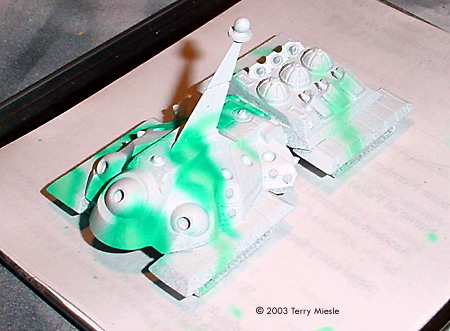
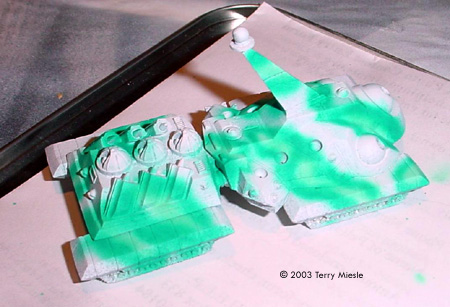
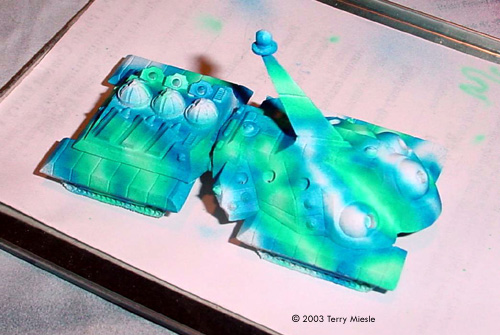
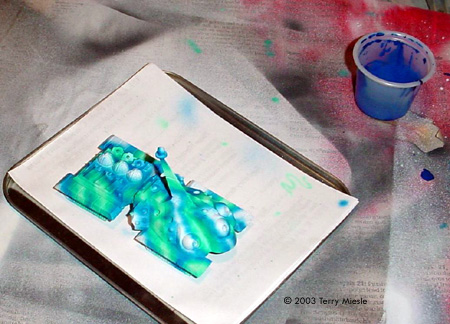
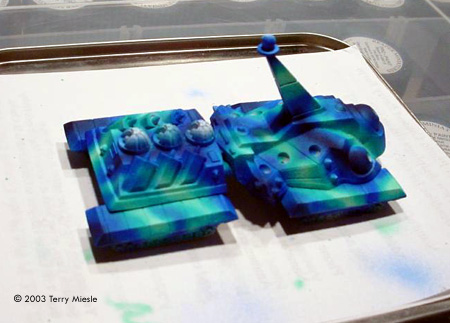
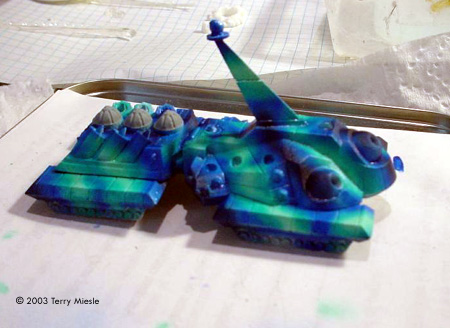
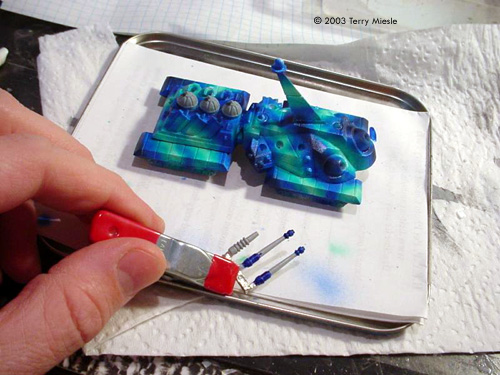
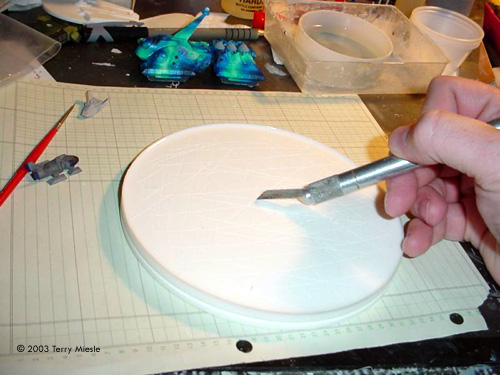
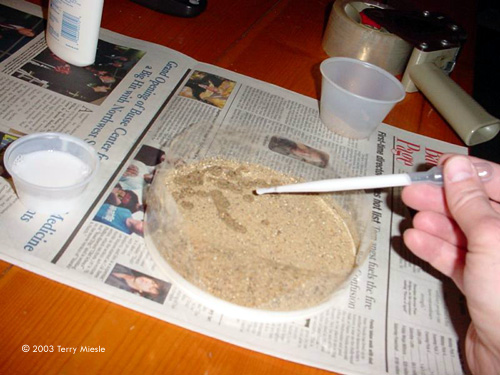
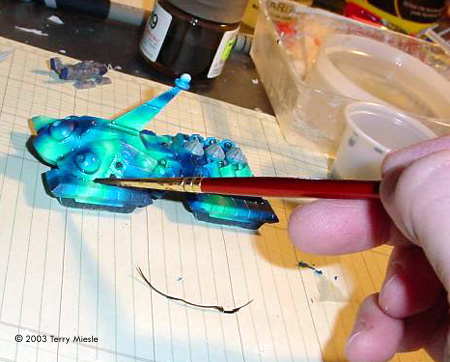
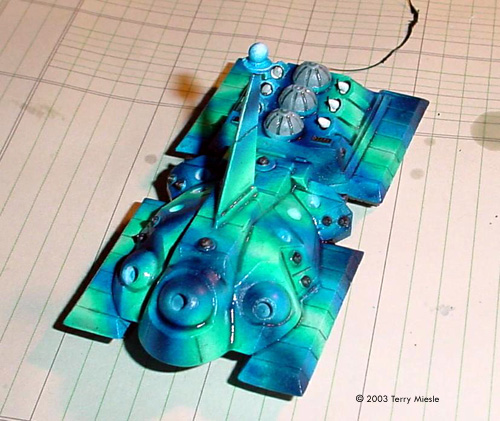
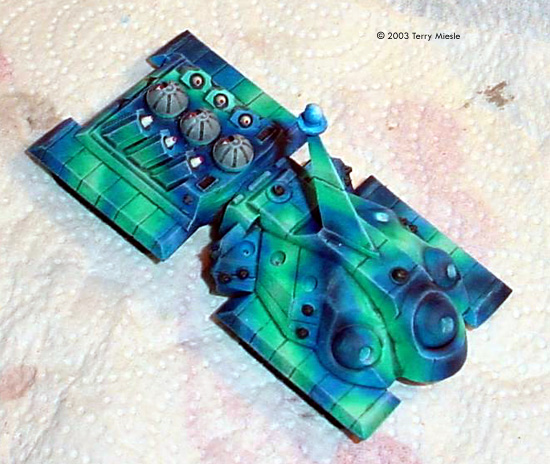
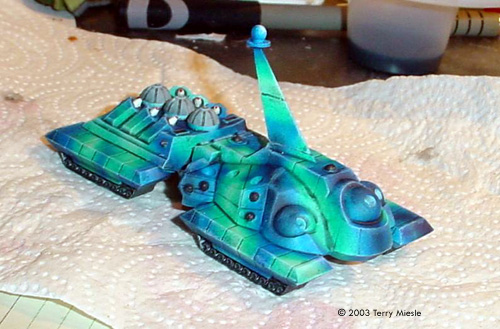
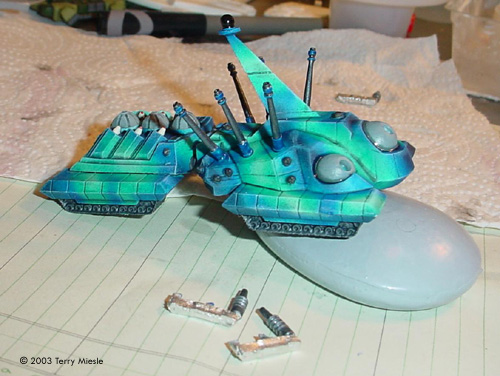
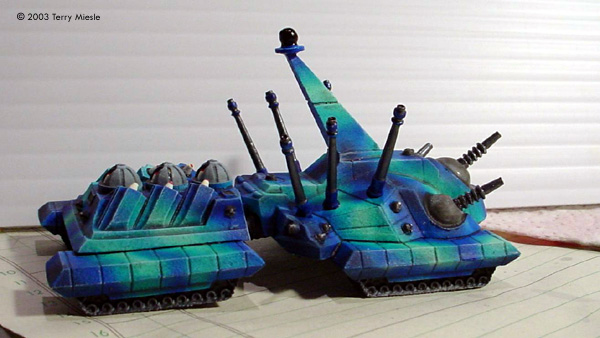
By The Numbers Step 01: Sea Foam was sprayed green in small irregular stripes. I’ll be painting light to dark here, so I’m not concerned about overpainting yet. Step 02: Bloodstone. This is a turquoise type of color, and provides the transition from green to blue. Step 03: Ocean Blue. A very pretty color. Step 04: Breonne Navy. Not quite midnight blue, it’s a very dark blue without the black overtone of midnight. Step 05: The final color blend. It's not a great picture, but I'm sure I'll get better ones later. Step 06: Here I've done two things. First, I've brushed future over the entire model. With miniatures I can use a soft bristled brush. Nylon is fine for this sort of work. The glosscoat future will protect the paints below. The Reaper paints tend to be very flat, which is good, except that flat paints are more readily damaged. Second in this picture, I've started to paint individual details. The missile launchers on the aft hull have been painted with Granite. Step 07: The guns will also receive a little color. Here the secondary batteries have a bit of Ocean Blue added. This will look good on the finished model. Step 08: Again, a poor quality picture. I've forgotten to activate the close-focus function on the camera. You can see the antipersonnel batteries have been painted with Steel Plate. Harder to see is Armor Grey on the roadwheel section and lining the single-shot missile tubes on the aft hull. Also, PolyScale Grimy Black has been applied to the flexible linkage between the hulls. This is very hard to see unless you look closely. Step 09: I've decided to make a vignette for the Ogre. I'll make a beach scene. This is resin (Smooth Cast 305) poured into a food container lid. This is a great way to produce a perfectly round disc. I have scored the surface to allow better adhesion for the layers to be added. Step 10: Here you can see I've placed packing tape around the perimeter to keep the contents in place. Then I've added sand. It's just plain old “play sand” for a sandbox. It's pretty coarse, but I'll sift some fine material through a screen later to apply to the seaside. Step 11: Diluted white glue will keep the sand in place. Step 12: I'll add some depth to the subject with a wash. This is about half Future, half water tinted with inks. In this case, I'm using Reaper inks, blue and black. This mixture can be kept for a long time if covered. Simply brush the mixture where you need to accentuate depth, as in the roadwheels or add shadows or provide contrast, as in the joints between body sections. Step 13: Here's a closer look at the wash results. Also note I've painted the missiles with Linen White. You'll see that I was a bit sloppy, and will have to touch up later. Notice how the wash lays in the corners and along seam lines. You will have to tip the model on its side to make sure these areas are actually at the bottom of gravity's efforts. Step 14: The next step is a dullcoat. I airbrushed a couple coats of PolyScale Flat, which makes the glossy tinted Future blend in nicely. You can see there is a slight glossiness left, I'd have to dullcoat once more. After that, I began bringing the details to the surface. The antipersonnel barbettes and vent grates are painted with Reaper's Steel Plate paint. The missile tips are painted Reaper's Dragon Red. Step 15: Step 15 is merely another dullcoat. You can see this is very nice now. Step 16: OK, a lot of little things happen in step 16. First, a bit of drybrushing. I find the Reaper paints work fairly well for crude drybrushing. I use a #2 Flat Promodeler brush for this drybrushing. Pick up some paint on the brush, remove most on a paper towel and gently drag the brush across the raised surfaces. I used a lighter shade of blue for on each color. For instance, the Sea Foam color was drybrushed with Ice Blue. The Bloodstone was drybrushed with Sea Foam, Ocean blue with Dragon Blue, Breonne Navy with Ocean Blue. This serves to bring the edges into contrast, and provide a sense of scale. The Tracks and guns are painted with Reaper's Gunmetal. This is a beautiful graphite color, and a very fine gunmetal color. The Ogre is placed on a little thing to allow the tracks to dry. Also, the sensor dome is painted Tamiya gloss black. After dry, the tank tracks are given a Tamiya Smoke wash. Once that's dry, PolyScale Flat was handbrushed to dull them down a bit. You can also see the Armor Brown color applied to the main gun gimbals. Step 17: Main guns attached, a bit of Tamiya Smoke applied to the main gun gimbals, PolyScale Dullcoat applied and the antipersonnel barbettes are ticked with silver. Here's another look. Step 18: The base, revisited. I've glued some gravel down, added some flat rocks made of sculpy, played with the shades, and added water. The gravel is merely from my driveway, bits picked to look a little like beach rocks. Sculpy is a synthetic clay, and if you fold it over and over again, working it like you do with clay you will find when you bake it too long, it becomes striated. This can be exploited to make something that looks kind of like slate or sandstone. I applied some diluted Reaper Caucasian paint to give the sand something resembling a tide mark. The water is Envirotex light. All of this was done while the tape was still in place. Step 19: In the final pictures (above) you see the Ogre in place, with a pair of little hovertanks. The small blue/gray hovertank is mounted on a pin to make it seem to float above the ground. The little brown hovertank would not be included in the final presentation, as I thought the vignette seemed a bit cluttered. If you look closely, you can see where the Envirotex was cut, forming a ridge. I should file this down farther, and apply Future to make it glossy again. Parting Shots So there you go. I know some of the steps were a number of individual steps but I hope I was clear enough. These minis are fun little projects. |
![]()
This page copyright © 2003 Starship Modeler™.
First posted on 21 November 2003.
Last updated 28 March 2005
![[Click to enlarge]](tm_ogre6a.jpg)
![[Click to enlarge]](tm_ogre6epoxy.jpg)
![[Click to enlarge]](tm_Ogre6primed.jpg)
![[Click to enlarge]](tm_ogre6compare.jpg)