
By Marco Scheloske - images & text © 2004
![[All done]](ms_wash_SQcomplete.jpg) Sometimes painting engraved detail is a bit problematic - as with the "veins" of the Seaquest DSV. Normally a wash - heavily thinned paint flowed into the recesses - will do the job. In this case, however, the lower areas have to be lighter than the raised ones - and that is nearly impossible to do with a standard wash because there is so little pigment that gets deposited. So here is a technique I discoverd which worked very well for me: |
|
|
Step 1: Cover the entire ship with the base coat of your choice - in this case, it should be the dark blue of the raised areas. Seal it completely with a water-resistant gloss coat. |
|
|
Step 2: Use clean water to moisten the area you want to work on. This can be a rather small section because you can blend adjacent areas into each other without any problem. Take a watercolor pastel crayon/pencil in the chosen color (light blue here) and cover the whole prepared wet part of the surface. To little water? Just wet the area again. The pencil should react to the surface just like watercolor. Don`t panic if it looks much too dark, as the color will become lighter when it dries. |
|
|
Step 3: When you`re done the area is covered with pastel "mud". Let it dry completely! |
|
|
Step 4: Next you need a clean and dry paper napkin/towel. Wrap the napkin around your favourite finger... |
|
|
Step 5: ... and gently wipe over the colored area. Make sure to use a clean part of the paper as often as possible, otherwise you will just smear the color back and forth. The pastel color on the raised panels will vanish very easily while it will stay in the „veins". If you wipe it out of the one or other vein simply paint it again with the pencil and wipe it off a second time. There is no limit to these steps; you can do them as often as you like. |
|
|
When you`re done the napkin will look like this one. |
|
|
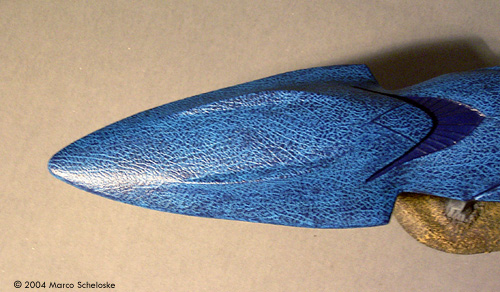
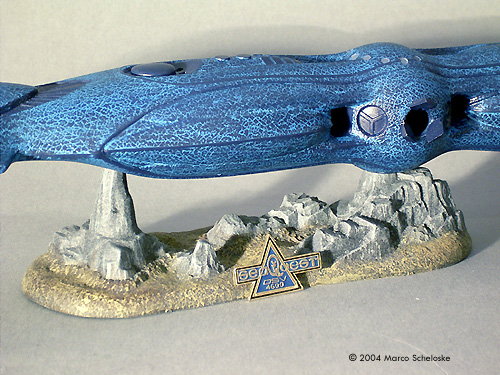
Step 6: Once you have "painted" the whole surface, cover it with a non-water-based clear coat (dull, semigloss or gloss, just choose by yourself). DON`T use a water-based coat because it could affect the pastel-filled detail! Here's some close-ups of how this worked on my Seaquest: Image: FrontImage: Middle |
![]()
This page copyright © 2004 Starship Modeler™. First posted on 22 June 2004.
![[Click to enlarge]](ms_wash_SQ1.jpg)
![[Click to enlarge]](ms_wash_SQ2.jpg)
![[Click to enlarge]](ms_wash_SQ4.jpg)
![[Click to enlarge]](ms_wash_SQ5.jpg)
![[Click to enlarge]](ms_wash_SQ6.jpg)
![[Click to enlarge]](ms_wash_SQ7.jpg)
![[Click to enlarge]](ms_wash_SQ8.jpg)