
By Scott Scariot - images & text © 2010
|
![[Please click to enlarge]](ss_surak2_2062.jpg) "Once he realizes we're not going to blow up the galaxy maybe he'll leave us alone." Captain Archer |
|
|
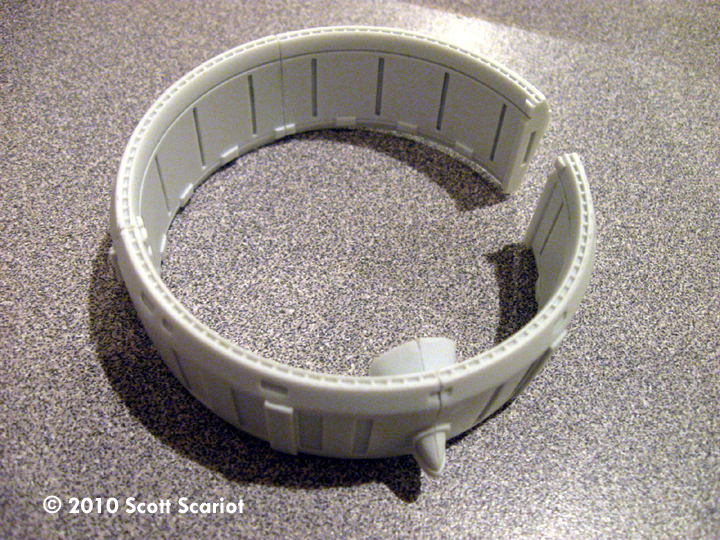
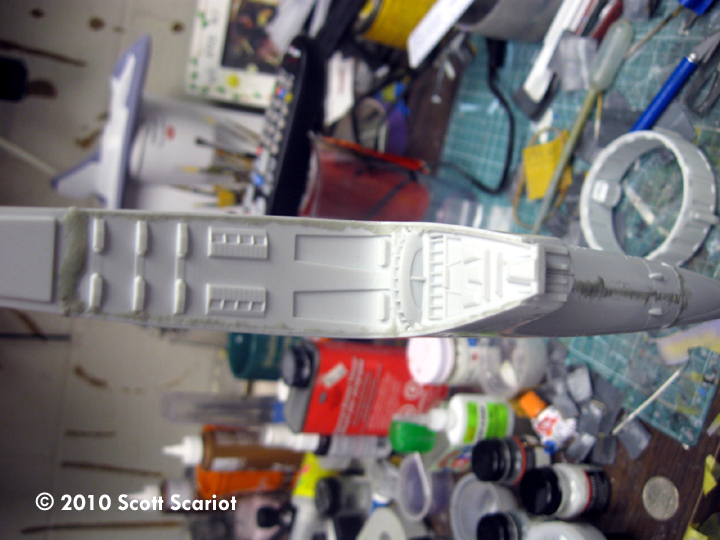
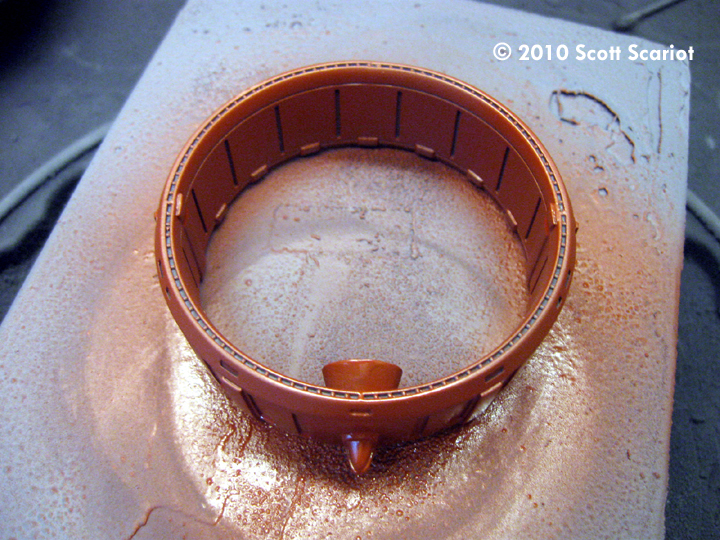
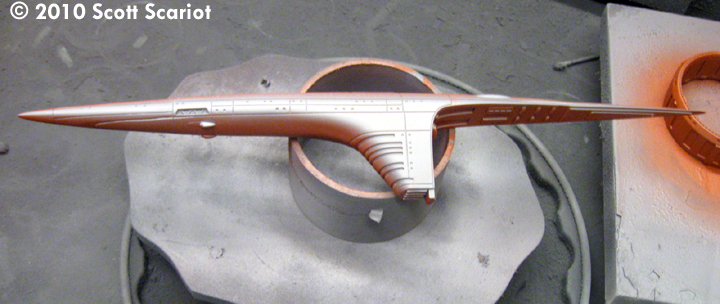
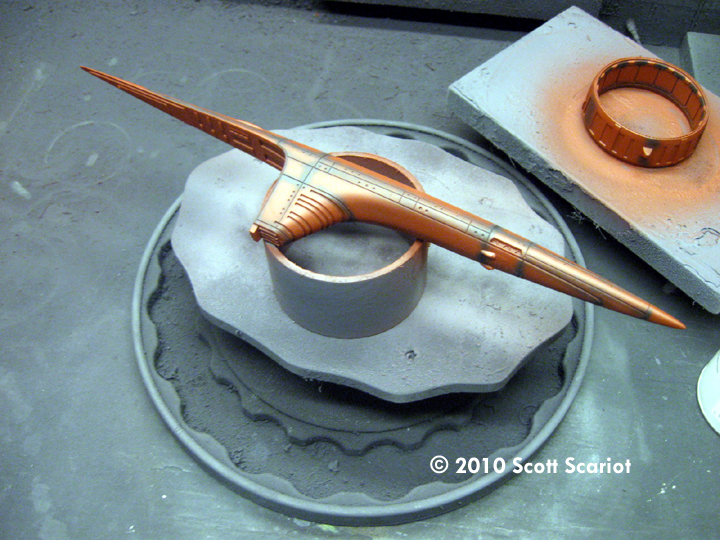
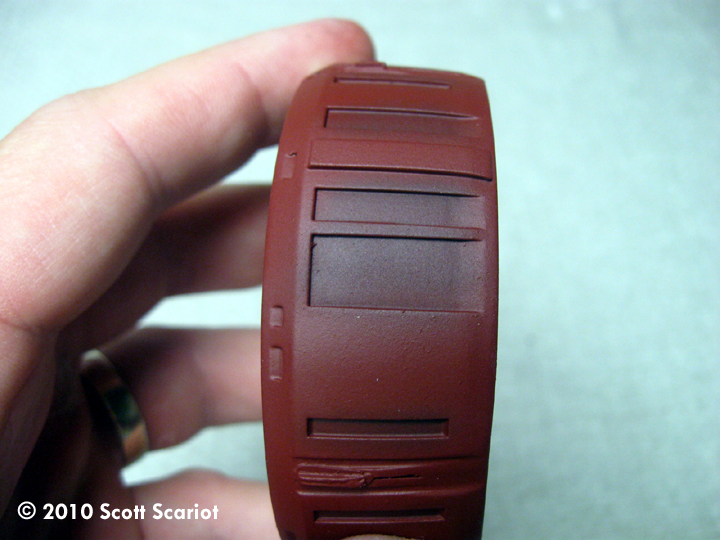
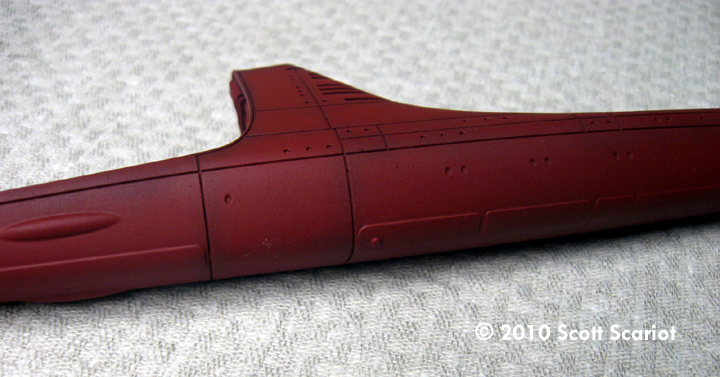
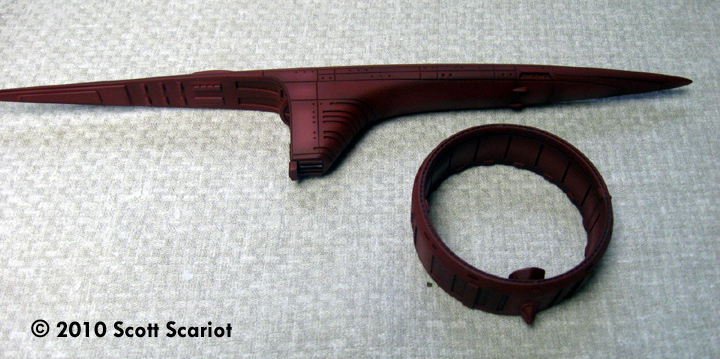
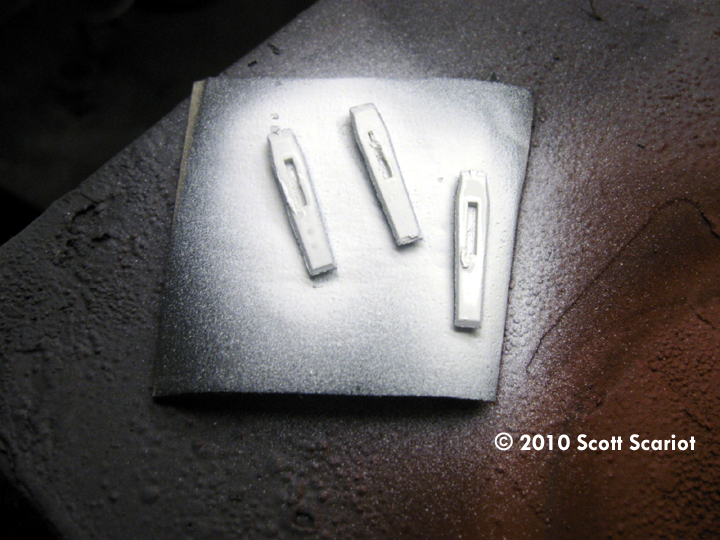
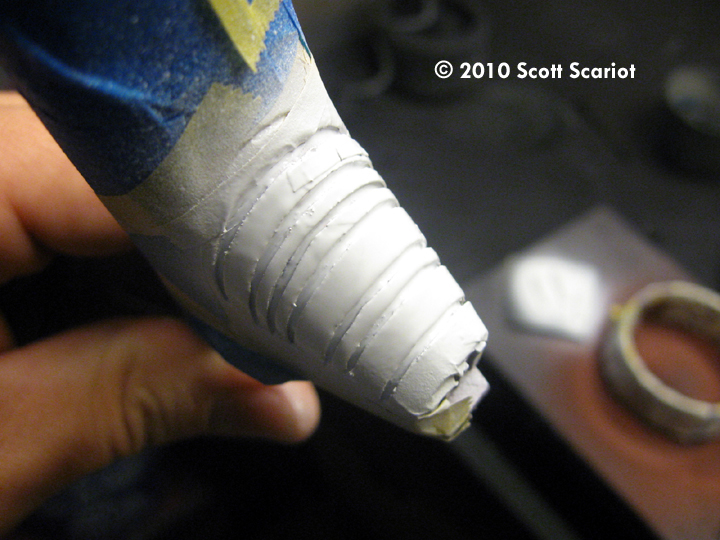
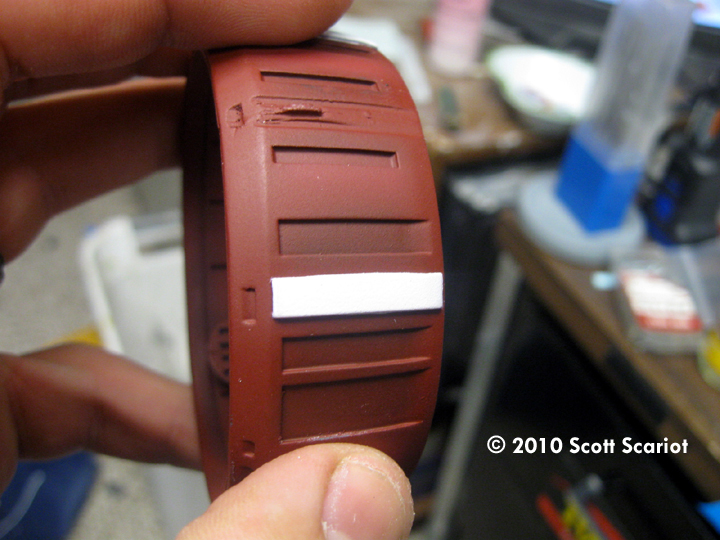
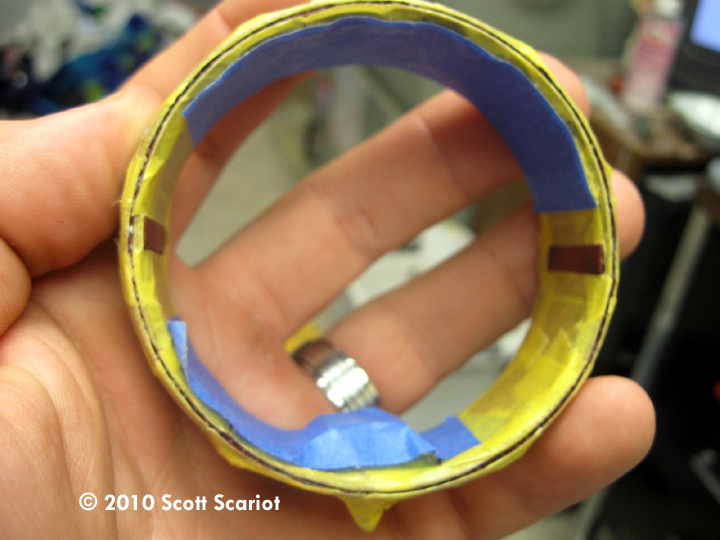
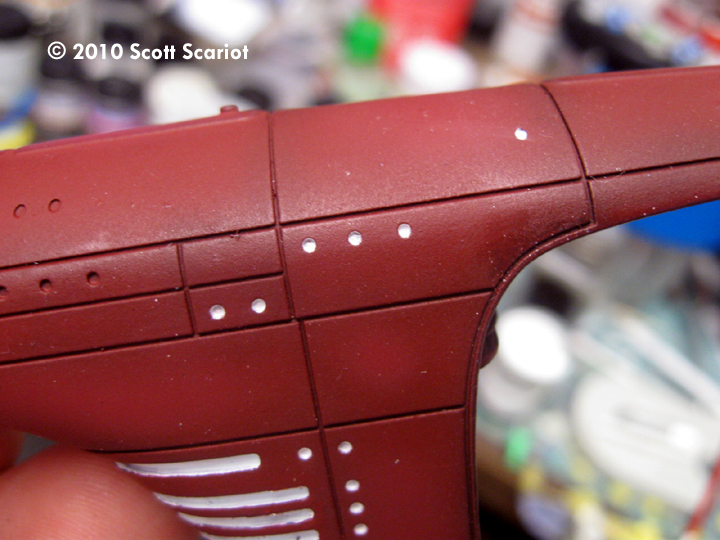
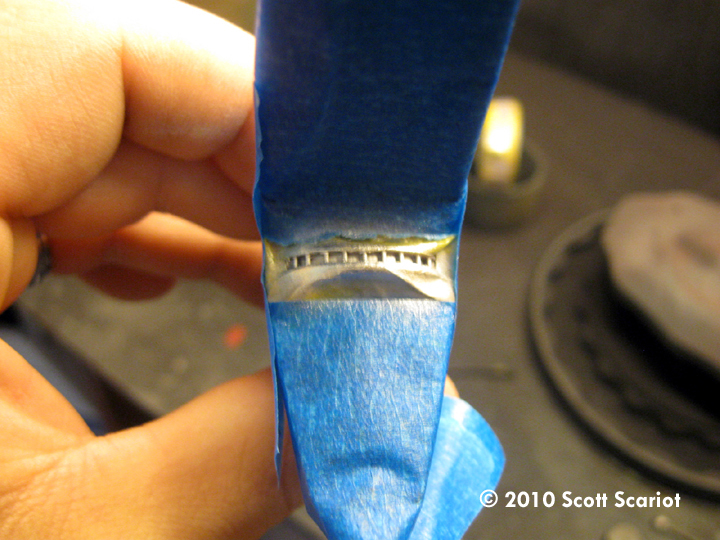
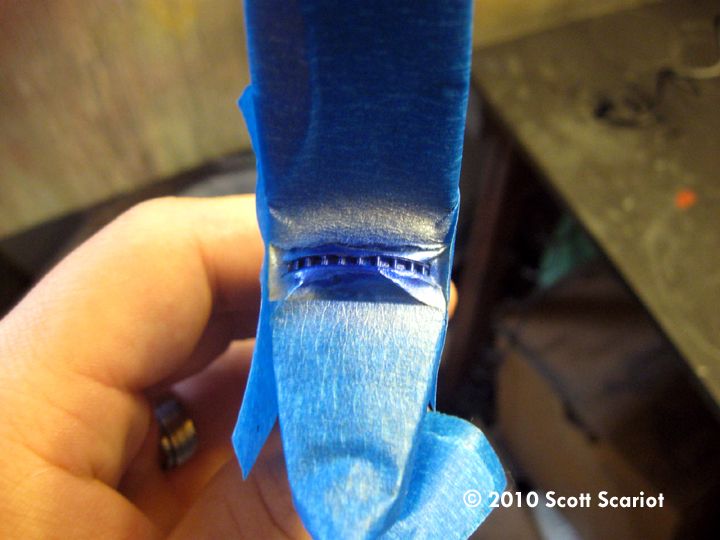
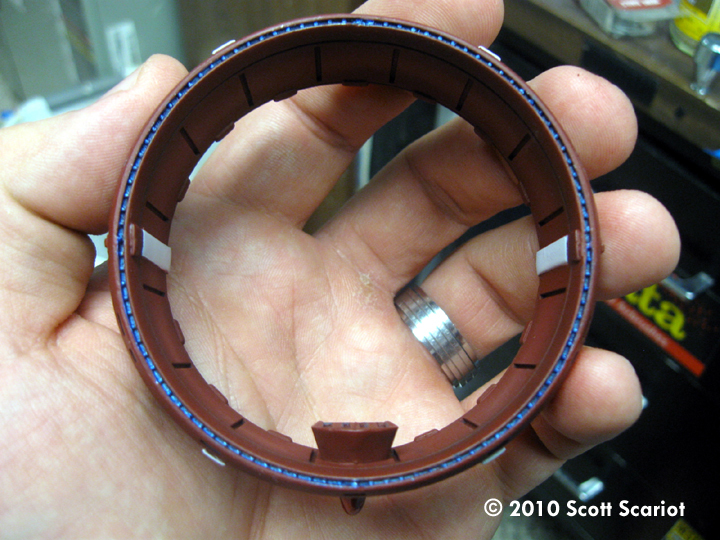
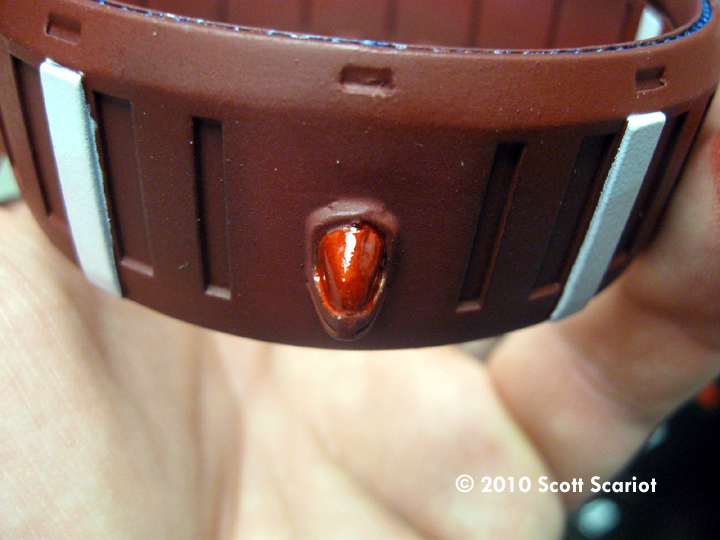
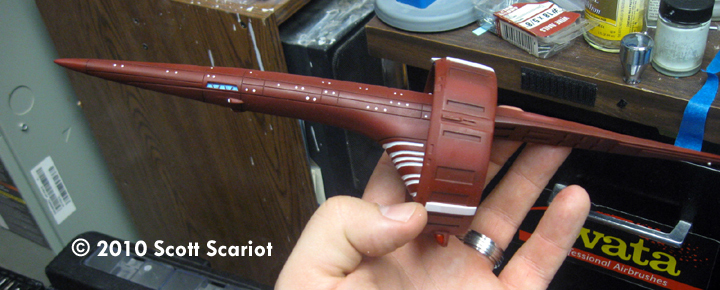
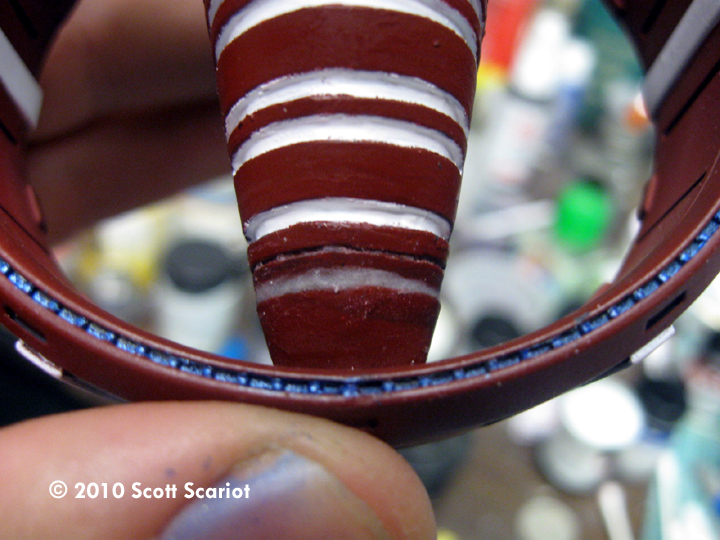
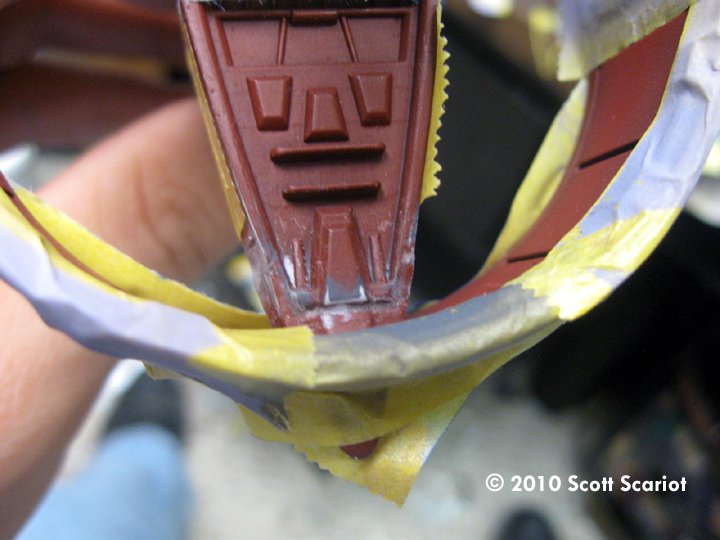
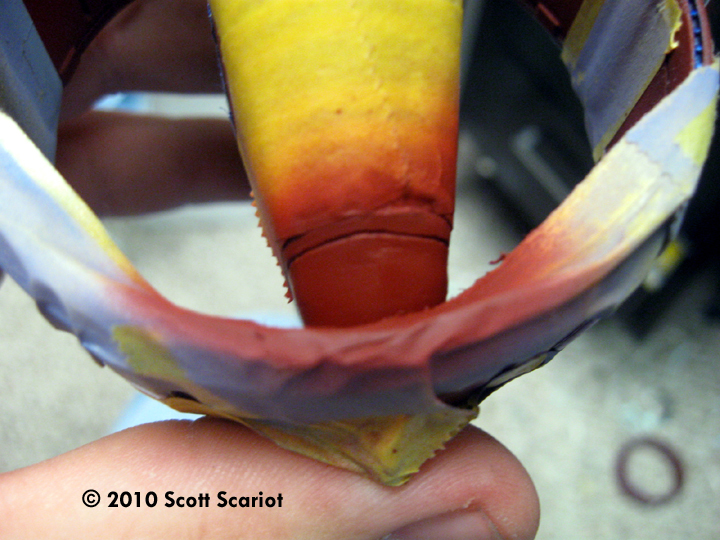
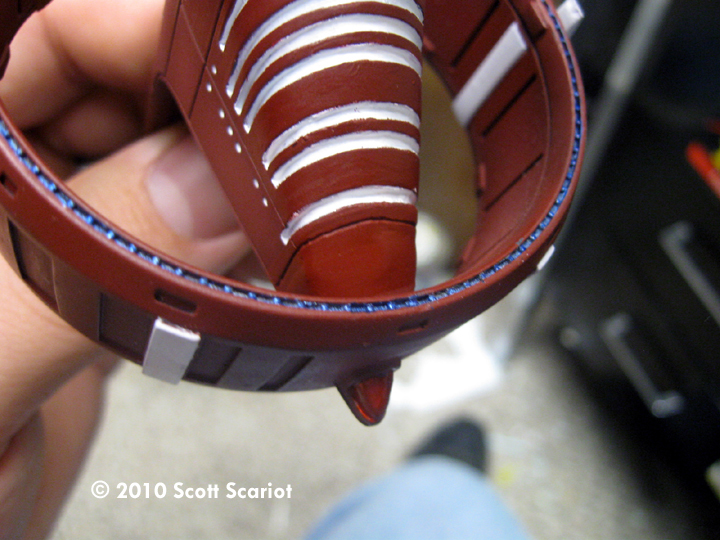
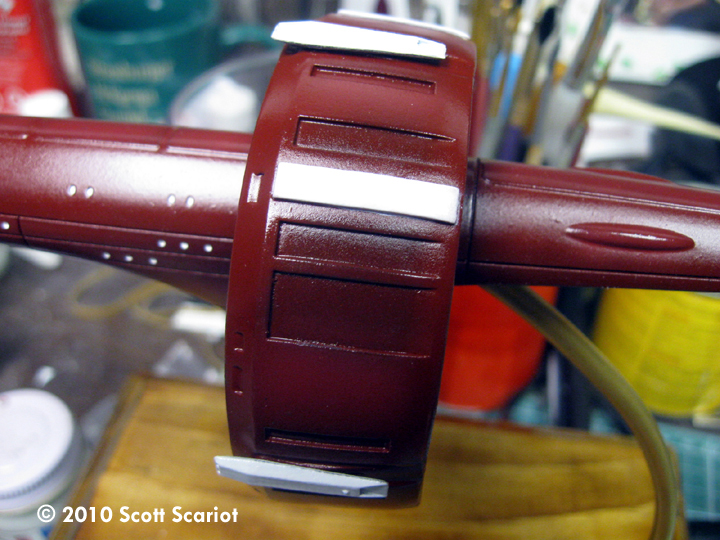
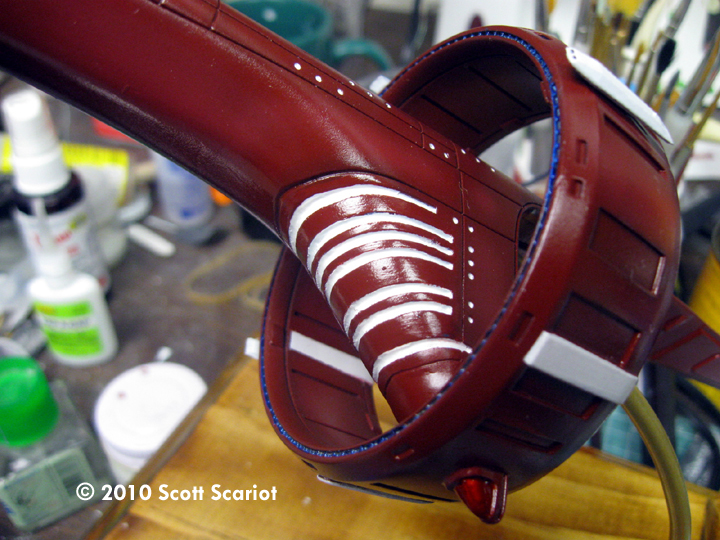
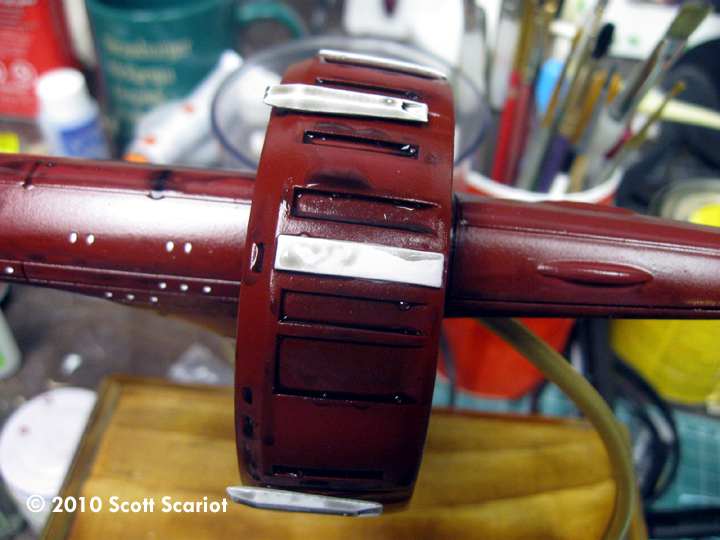
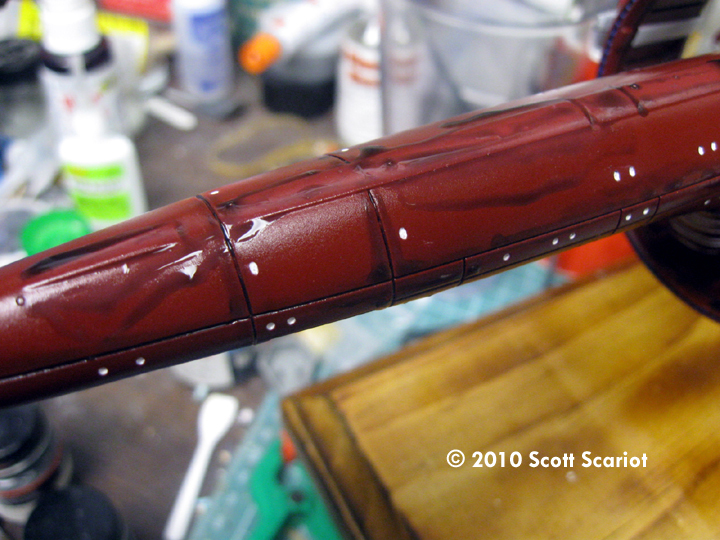
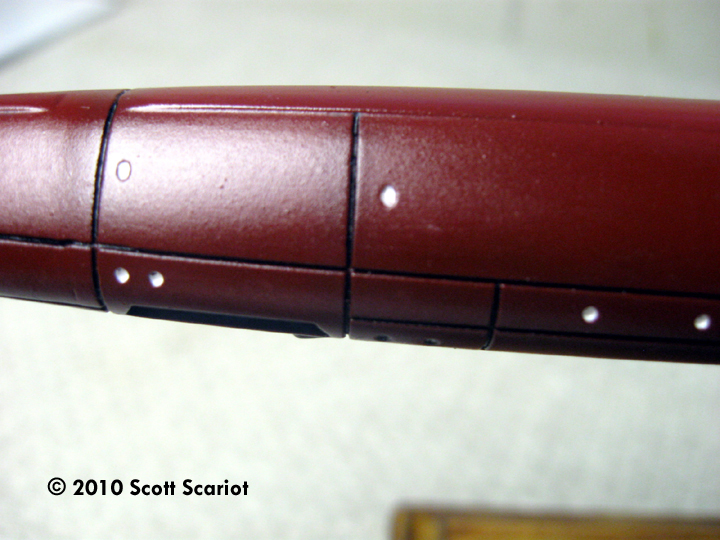
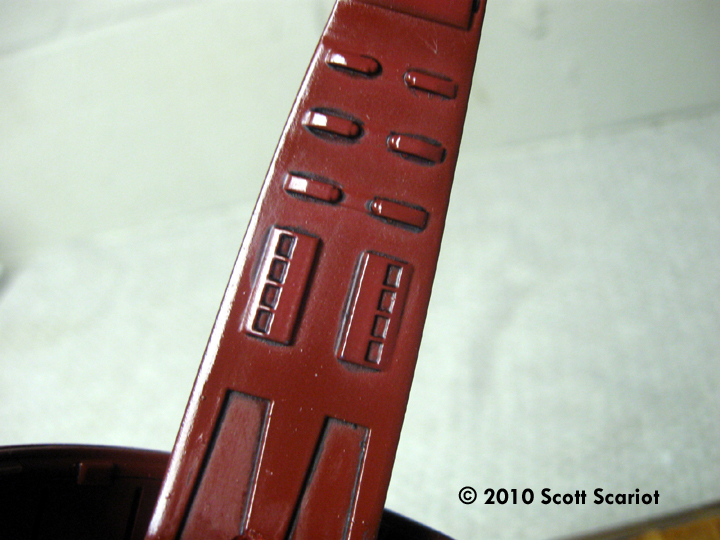
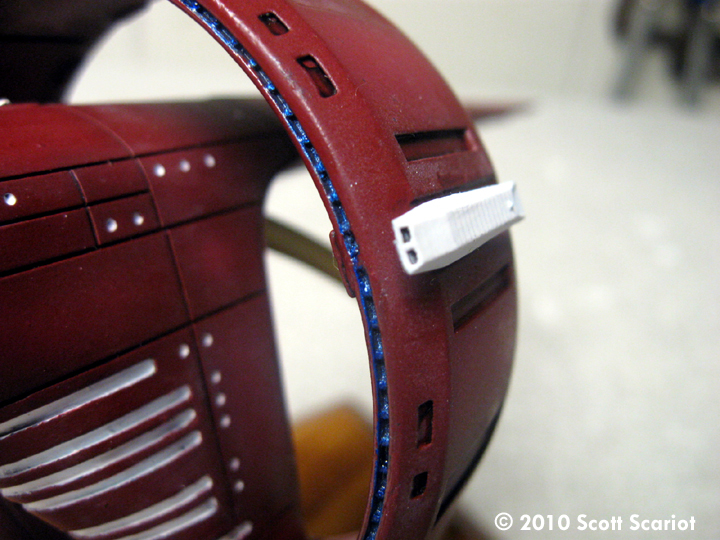
The Surak class made its debut in the Star Trek: Enterprise episode “Breaking the Ice” as the Ti'Mur. The ship designed by Doug Drexler was just a brilliant design. Assembly After I completed the preview for this kit, I got to work on the model. I cleaned the parts with warm soapy water and then a mild abrasive cleanser. Then I let the parts air dry. Once the parts were dry I cleaned up the flash, pour stubs. Once that was done I assembled the main hull and the warp ring. The kit goes together like a dream. The only issues were that some of the pins fit so tightly into the guide holes that they mushroomed and had to be cut off. The warp ring did not close in tightly so I had to use a little force it get it to close into a complete circle. I had planned to build the ring in two halves and glue them together. But I didn't pay attention to what part I grabbed so I had to build it in a complete circle. That may have been a happy accident because I just had one seam to really deal with. Other than that it went together like a dream, no real huge seams and the panel lines line up nicely. Once I had the main hull and the warp nacelle assembled I used Aves epoxy putty to fill the seams. I used alcohol to smooth the putty before the it had set. I sanded the seams down after the putty set. I started with 200 grit and ended with 320. Once I had all of the seams sanded the model was ready to be primed I use Dupli-color automotive primer. The stuff is great for modeling. I sprayed the model with a coat of primer and after it dried I checked out what the seams looked like. To my amazement they looked pretty good. Just a couple of areas needed attention: the top of the spike, a couple areas on the bottom rear of the spike and a couple areas on the ring. I sanded these down and if needed I refilled the seam, this time with Tamiya gray putty. Once all of the seams were filled to my satisfaction I re-sprayed the sub assemblies with primer. Painting Once the primer set I laid down the base coat. The color I used was Testors Model Master British Crimson. The early versions of these ships were Red and the later ones were Brown. The Crimson color I think is a nice choice between the two. Once I had the whole model base coated and it had dried. I sprayed the panel lines with Black. I tried to be artsy on the warp ring and I sprayed the raised flat areas on the ring with a little Black, then I remembered my art classes the low areas on the ring should be darker. So I repainted the raised areas Crimson and once that dried I sprayed the low areas black, and then over coated with Crimson. I also over coated the spike with Crimson. The results were great. I lightened areas of the model by adding White to the Crimson. Once the highlights had dried I masked off the rectangles on the ring, and the stripes on the bottom of the spike, then I airbrushed them White. The next day I removed the masks from the ring and the rectangles looked real good. But, when I took the masks off of the spike I was less than happy with the results so I broke out the paint and my fine tipped brushes and after about a 1/2 hour I had the lines cleaned up to where I was happy with them. The inner part of the ring has a blue glow to it. To recreate this, I had to mask off the entire ring so I could paint his inner part. While I was masking off the ring I found out that the rectangles inside the ring should also be white by looking at images of the Surak at Doug Drexler's blog, so I masked them off as well. I also noticed that the small triangle under the ring glowed red, and I masked that area off as well. After all of the parts were masked I painted the areas with Alclad II Chrome. Then I painted the inner ring and impulse engines with Model Master Acryl Arctic Blue Metallic. I used Tamiya Clear red to paint the Bussard Collector. When I removed the masks I found that I had some clean up to do but nothing major. The windows were fun. To 'paint' them I used a milky gel pen to color each window. It only took about 10 minutes to paint all of them. I also used a Light Blue gel pen to paint the large observation deck windows. With the detail painting completed I was ready to glue the two sub assemblies together. This was done easily with CA glue. Once the two assemblies were joined together I filled the seam with Aves. To avoid damaging the surrounding areas I masked these off so I could sand down the seam. Once this seam was sanded down I painted the area Crimson. The model was ready to be gloss coated. I sprayed several light coats of Future onto the model. I gave the Future a day to set and the model was ready for weathering. Finishing Touches I use a sludge wash as my wash of choice: water, dish soap, and a little Tamiya paint for color. This stuff is so easy to put on. And the great thing about it is that it's mostly soap so it just washes off if you mess up. Basically all I did was apply the wash to the model with a fine brush and let it flow into the panel lines. The details on the model really popped! To remove the excess wash I used a damp paper towel to wipe down the model. With the wash applied it was time to flat coat the model. I use Flattened Future as my flat of choice (Flattened Future is Future mixed with either Tamiya Flat Base or talcum powder). I like it because Future dissolves itself and won't react with the gloss and orange peel. I laid the flat down in two light coats. Once the flat had set I used a fine tipped brush to re gloss the windows and the bussard collector, warp and impulse engines. To display the model I drilled a hole in the bottom rear of the tail area. I bent a piece of Ľ” brass rod slightly and attached that to a stained plaque. As always I attached a dedication plaque to the base. Conclusions Wow! What a model! The Delta Quadrant has produced a wonderful model. The parts are crisp. And the fit is great. The guide pins are a bit snug, but that is a minor issue. The British Crimson color works very well for this ship. I could not be happier with how the model turned out. John Eaves complimented me on the build at WonderFest. What higher compliment can a modeler get? |
|
Additional Images Image: Main hull assembled - rubber bands keep the [parts in place while the glue setsImage: Ring Image: Test fir Image: Filling seams with Aves Image: Aves sanded back Image: Seam magic Image: Touching up with Tamiya putty Image: Base coat in the ring Image: Spraying the hull Image: Starting the post shade Image: Post shading adds depth to recessed detail |
Image: Base color tones down the post shade Image: Main hull and ring Image: White paint Image: Masking off the white areas on the main hull Image: Masks removed Image: Masking off the glowy bits Image: Windows Image: More windows Image: Alclad Image: Now the blue Image: Red for the bussard collector Image: Ring masks removed |
Image: Looking good Image: Bussard, touched up Image: Ring and hull assembled Image: More Aves fills the seams Image: Sanded back Image: Touchup paint Image: Masking removed Image: Gloss coat Image: Shiny Image: Sludge wash Image: More Image: Excess wiped off Image: Detail Image: More |
![]()
This page copyright © 2010 Starship Modeler™. First posted on 30 September 2010.
![[Please click to enlarge]](ss_surak2_1926.jpg)
![[Please click to enlarge]](ss_surak2_1959.jpg)
![[Please click to enlarge]](ss_surak2_1978.jpg)
![[Please click to enlarge]](ss_surak2_2001.jpg)
![[Please click to enlarge]](ss_surak2_2006.jpg)
![[Please click to enlarge]](ss_surak2_2015.jpg)
![[Please click to enlarge]](ss_surak2_2021.jpg)
![[Please click to enlarge]](ss_surak2_2027.jpg)
![[Please click to enlarge]](ss_surak2_2040.jpg)
![[Please click to enlarge]](ss_surak2_2051.jpg)
![[Please click to enlarge]](ss_surak2_2072.jpg)