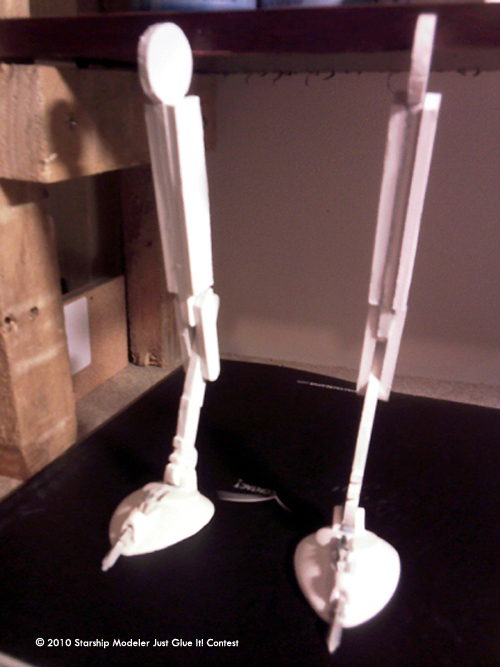
LEGS
Next I turned to the plastic display board that I imagined would make the majority of the flat panels of the legs and head. I don't know the name of the plastic I used here but it was quite dense, hard to cut but very sturdy once shaped. Fortunately the board was 5mm thick, a very handy size for the leg panels at the scale in which I was working. (Thanks again Mr. Tablespoon). I decided I wanted as many joints as possible to be flexible so once the panels for the legs were cut I bolted, rather than glued them together.
BODY
Now that the legs and feet were built, time for the body and swivel neck for the head. The main core of the body is cut from a different, lighter type of display board. This time a kind of styrene sandwiched between 2 layers of thin card, a lot lighter and easier to cut but much less robust, so only good for chunkier parts of the model. Also, it being a foam sandwich, the edges looked pretty shoddy when cut. Since however the side edges of the body are pretty well hidden by the legs, I took the lazy option and used this instead of the hard stuff, the ravages of cutting the legs with a Stanley knife and coping saw having taken their toll. Yeh ok but it is my first time!
The elongated hexagon shape at the rear of the body was built by first cutting two layers of the hard stuff to size then cutting and sanding the edges to the required slope. After gluing these together they were glued to the main body, all using araldite precision. I next constructed a box from very thin clear plastic to fit round the back end of the body. Similarly thin plastic was cut to add the detail on the rear body panel.
The power cells on the side of the body were arduously carved from the hard stuff and the details on top are 2 strips of cable tie and a small junction box from a defunct TV box that I cannibalized for parts.
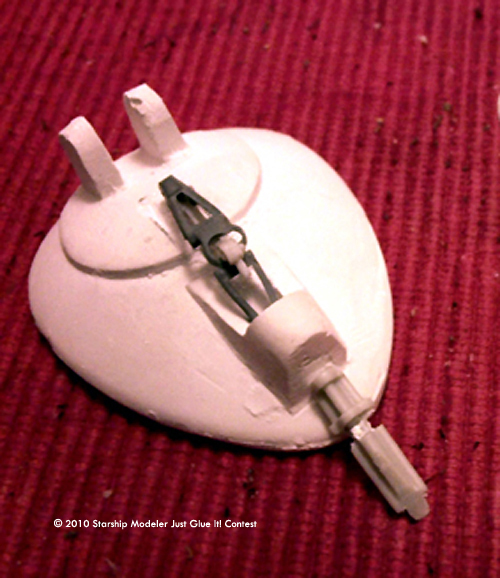
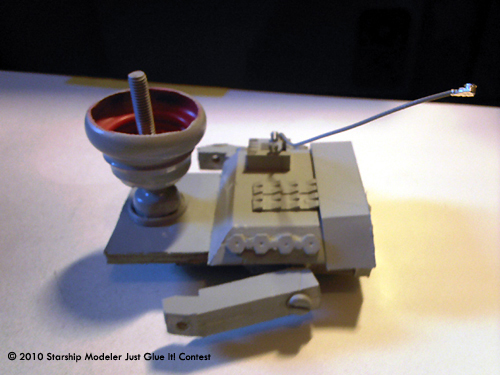
In order to mount the head and have it swivel I dressed a nut and bolt with the top of a sauce bottle and a small sucker-like component of a spray bottle top. The leg joints that attach to the main body were also a puzzle. At first I wasn't sure how I could make them sturdy enough. The milliput botch turned out to work. Cutting a trench through the first layer of styrene, from one side of the body's base to the other, I laid a bolt in and plastered the lot with milliput. I didn't want this 'axle' to rotate or the head would drop forward. The bolt secured the upper leg joints that were made from 2 layers of the hard stuff cut at the ends to an angle, which gave the rest of the leg clearance from the body.
Having only limited time to indulge my hobby, doing a first time scratch model and working with pretty basic gear meant that so far this had taken about 4 months.
Never mind, it's not a race!
(Just as well!)
HEAD
Yes this could be a little tricky.
The styrene sandwich was the material of choice for the head because if I screwed up, then at least it wouldn't be after hours of struggling to cut parts from the hard stuff. Besides, the head needed little strength and would benefit from the styrene's lightness. I was pretty uncertain of the curves along the sides of the head so basically, they're not there. The head therefore looks a little narrow, I think. I cut two side panels, a front and rear and a base panel for the cockpit floor. The styrene was soft enough for pinning the head assembly together for a test fit and good for securing the parts while the glue, Araldite Precision again, dried.
I hadn't made the roof yet because I needed access to the floor when it came time to attach head to body. Also the nose canons needed space to fit and adjust from above.
The moment I attached the basic shape of the head to the body and legs was a glorious milestone! I now had something that looked like an A.T.S.T.
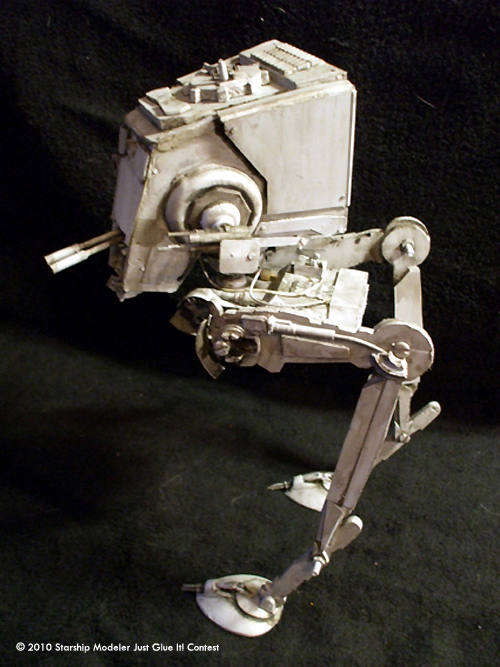
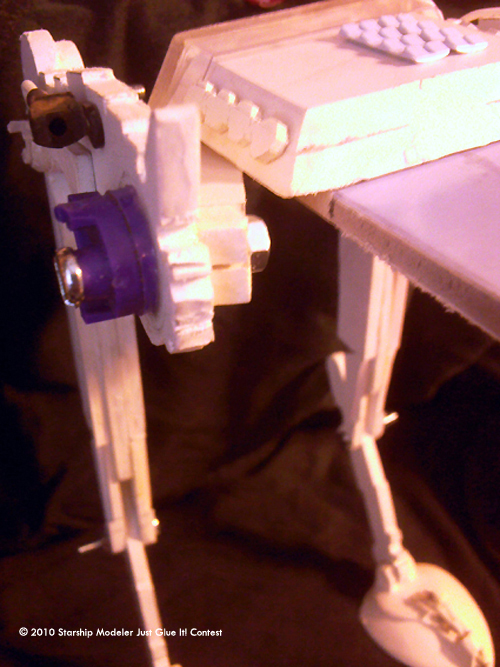
I must say that from the moment I started this model I was collecting any discarded bit of plastic or metal that had any detail potential. By the time I got to this stage I had 3 or 4 bags of greeblies, (is that what you guys call them?) Disposable lighters were employed to detail the legs. The purple knee joint in the above photo is a part sawn off the top and the pistons on the side, the flint assembly of lighters. These I know are not strictly accurate but I think they work reasonably well once painted. Also this photo shows the first swivel neck cover, which was far too straight and eventually replaced.
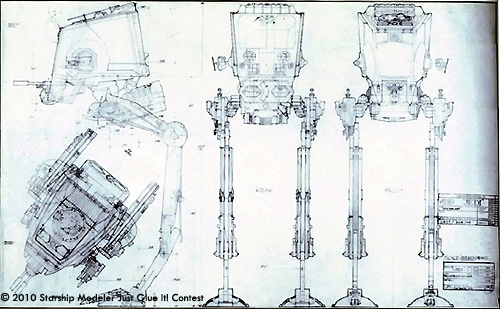
It proved quite difficult to find comprehensive reference shots of this machine so a lot of the body beneath the head and towards the front is pure guess work. One of the things that impresses me most about the models in this movie is that certain areas of them always disappear into chaotic, mashed up mechanics with detail so dense, its almost impossible to copy.
HEAD DETAILS
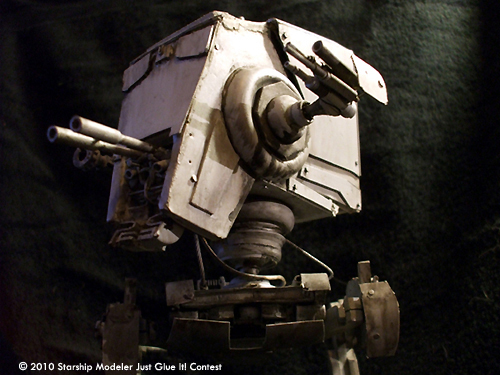
Leaving the problem of the body front for later I began searching for details for all the guns, the gun turrets and blast shields. Another trip to the kitchen proved very fruitful. A certain make of herb jar lid had almost the exact diameter for the gun turrets on each side of the head. This plus a hexagonal piece of styrene, another part of the spray bottle and a plain screw to attach the lot to the head came out very well I thought.
The guns were made from cigarette lighter parts, tubing from the spray bottle, parts of the old TV circuit board all glued with araldite. These were secured to the flat ends of the turret screws using milliput. The smaller armour plates were cut from large cable ties. The large armour plates at the back of the head are DVD covers cut to shape. I used these because they had the right corner edges wrapping neatly around the top and back of the head.
The main front canons had to be mounted on a kind of rotating caddy. Something else I couldn't get a clear photo of. Spray bottle assembly to the rescue once more. A circular piece of that was cut on its diameter making 2 semi-circular halves. These were then glued together side by side, which gave the correct width to fit the gap at the front of the head. The cannon nozzles were made simply by gluing a thick piece of spray bottle hose to a thinner piece from a different spray top. I'm always on the look out for different designs of spray tops, they're very useful. The canons were then glued to the semi-circular caddy and the whole thing held in with cheek piercing-like pins.
THE ROOF
It's complicated, scratch building. I had a lot of luck with this but the roof was difficult. I thought there was a slight tilt downwards toward the front end of the roof. So I built it into the sides when I cut them. That meant that the roof would have to break at an angle and that the panel that holds the hatch would either have to slope down with the tilt or stay straight but then require an angled support underneath. I chose the latter, filling the gap beneath with milliput. Fitting the roof was hard because there were slight flaws in the head shape, which meant the roof had to be altered to accommodate.
The front panel with viewing shutters was also a troublesome fit due to the warped nature of the head. The panel was made from plastic milk bottle and cable tie for the shutters. Really I could have started the head over but Id been at this on and off for 5 or 6 months now so it was full steam ahead. The whole process was a learning exercise anyway. The roof hatch was cut, rather foolishly from styrene. Those edges look rough but again the thought of cutting every notch from the hard stuff defeated me. The detailing on the hatch is part cigarette lighter, part bit of plastic I found on the ground.
It was time to tackle the front of the body section. I work in recycling and this is good, very good! After all, this model IS recycling.
After dismembering an old printer cartridge salvaged from work, I realized that 2 of the ratchet like parts fitted very nicely on the front of the body. They were not exactly the shape I needed but they added significantly to the muddle that seemed to occur at this part of the walker. I also attached wires to various places on the body the other ends of which would be secured to the head.
After this I needed blast shields for the lower and upper sides of the body's front end. These were cut from a plastic milk bottle and pinned in position.
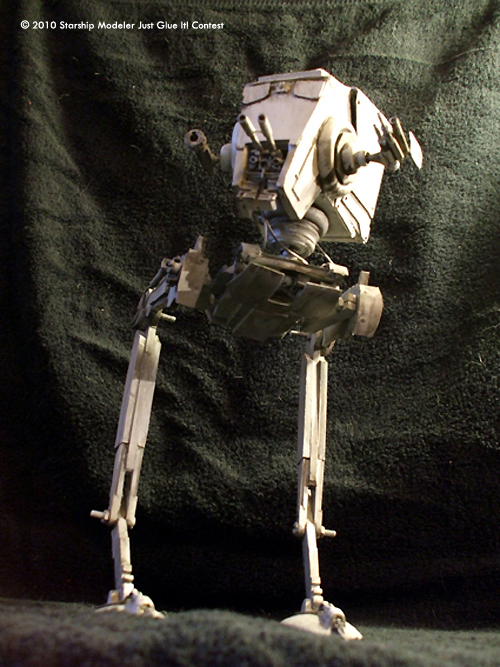
I had started adding a base coat of matt grey on much of the model and thought it might be time to go for the signature lived-in battle scarred look that distinguished all the Star Wars models from most other films of the time. After filing and sanding (not thoroughly enough!) I gave the whole thing one more coat of matt grey then proceeded with thinners and black paint to weather the beast. There are many details to be added (like the inside of the legs) and some stuff to be removed (like the protruding bolts) but with scratch building it could go on forever! The back panel of the head needs a few more details but I'm pretty happy with the results so far. I cut four boxes for the rear panel detailing but for now the kitchen has not produced the parts necessary to complete this side.
Having found everything I needed 'just laying around' to build this model. (bar the nuts and bolts and glue) it really only cost me time. I'd recommend scratch building to anyone who's never tried it. Go on! You'll love it!
Anyway, here it is, its been a great challenge and a whole bunch of fun!
Image: Left/rear view
Image: Drawings
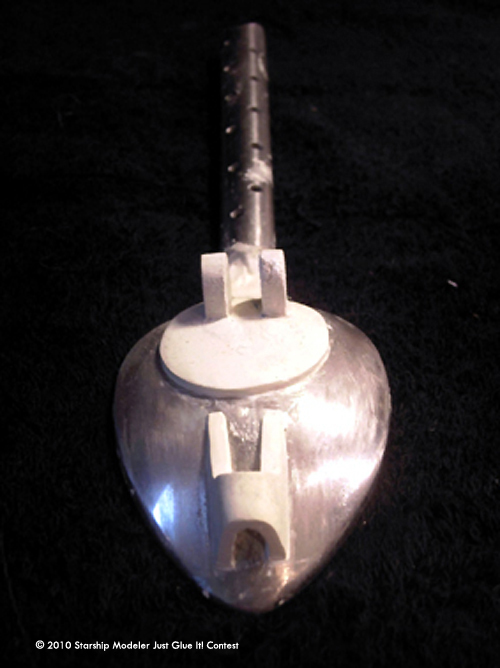
Image: Thank you Mr Tablespoon
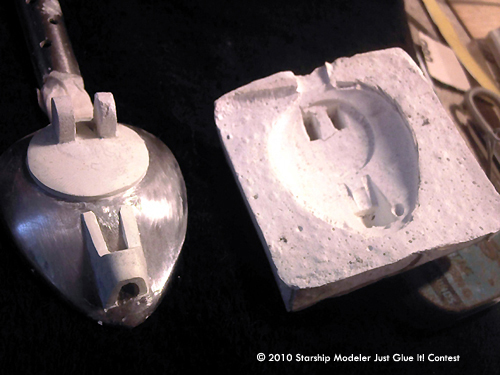
Image: With mold
Image: Foot
Image: Legs
Image: Body, started
Image: Finished body (front)
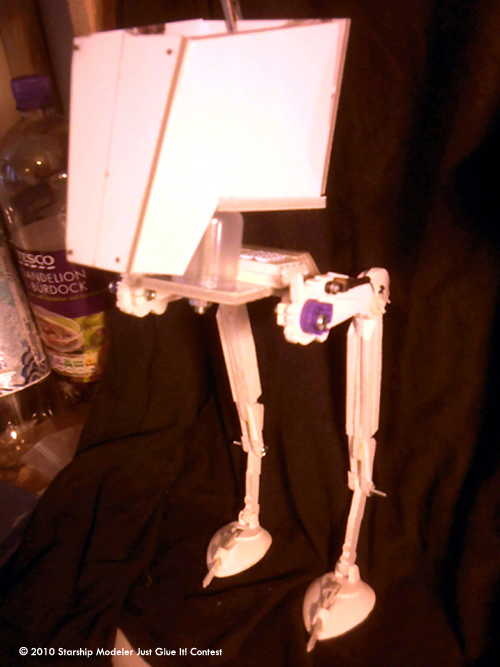
Image: Legs attached
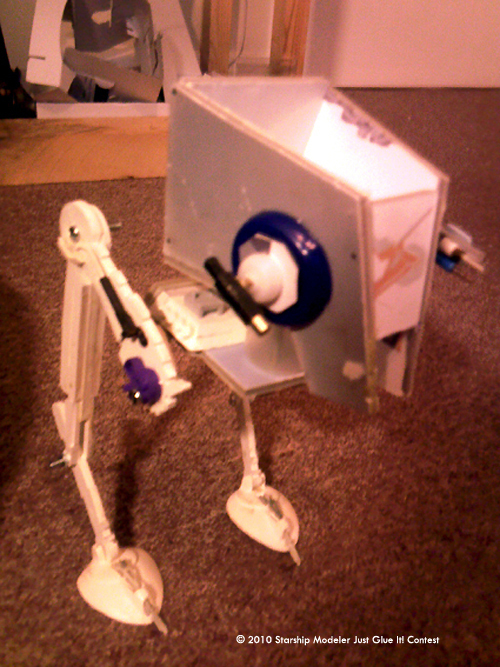
Image: Head
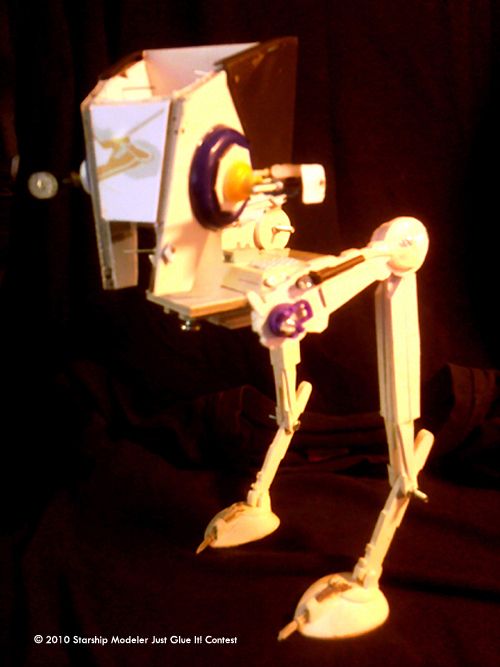
Image: Armament added
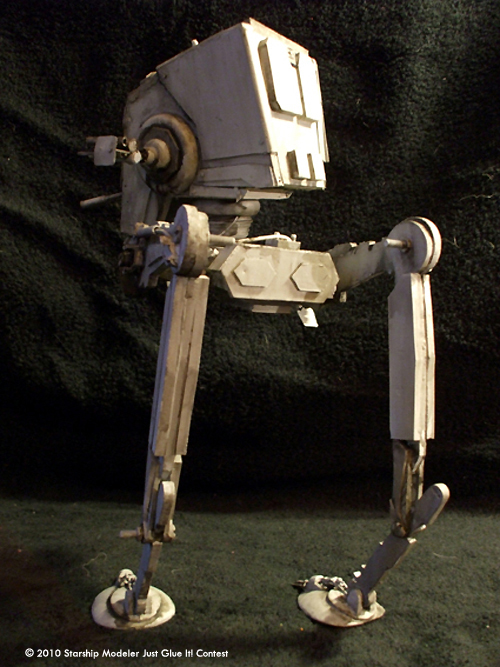
Image: Before painting

![[Just Glue It!]](contest_justglueit_banner.jpg)
