
By Brett Green - images & text © 2002
The Vostok spacecraft carried Soviet Cosmonaut Yuri Gagarin on the first manned space flight on 12 April, 1961. Gagarin completed one orbit of the earth before a troublesome re-entry and ejection from the Sharik sphere, completing his journey by parachute. The Space Race had begun. The Vostok spacecraft was based on the Soviet R-7 Intercontinental Ballistic Missile. This design undertook eleven launches between December 1960 and June 1963. Cutting Edge's 1/144 Scale Vostok Cutting Edge has launched into the field of real space models with the Vostok and R-7 Booster in 1/144 scale. This is Cutting Edge's first model in the Lift Off series. |
![[Built up]](vostokreviewbg_24_.jpg) |
||||||
|
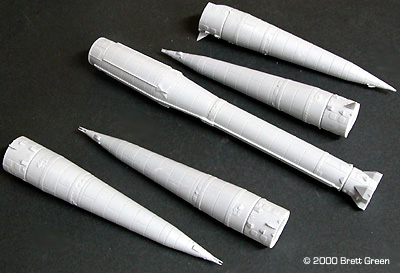
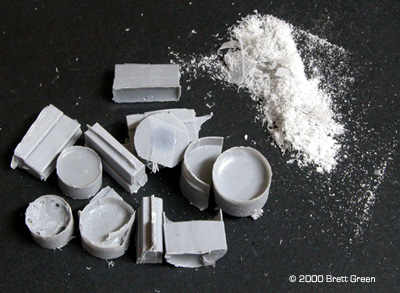
The model is comprised of 34 pieces in grey resin. Generous quantities of spare parts are also supplied, boosting the contents of the package. Casting quality is very high, especially considering the size and weight of the individual castings. There were a few tiny, cauliflower-shaped casting scars on the larger parts, but these were easily sliced off and sanded down. Despite careful packaging, two of the stabiliser fins on my Vostok had broken in transit. Two spots of superglue resolved this problem.
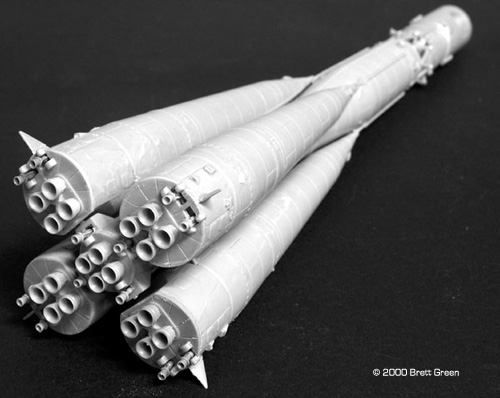
The main body of the rocket and the R-7 boosters are very substantial lumps of resin. These are complimented by some delicate castings of the "V" shaped supports for the third stage, small nozzles and the interleaving straps that secure the booster units. |
|||||||
|
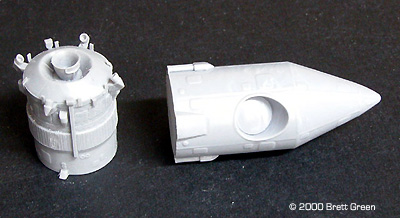
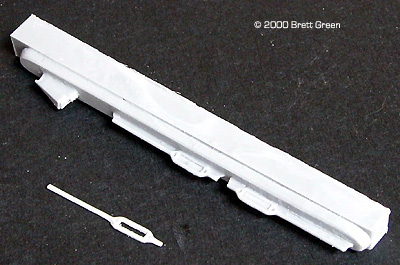
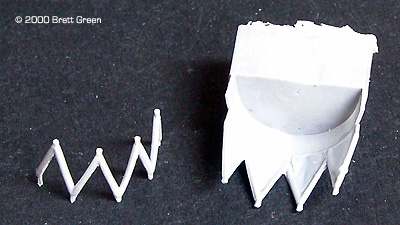
Image: Main and strap-on booster bodies Image: Third stage and payload Image: The straps were cut off with a sharp hobby blade and then carefully cleaned up. Image: The excess resin between the "V" shaped supports for the third stage was nibbled away with sprue cutters then finished with a knife. Image: Cleanup results in an impressive pile of waste resin! |
Construction
I have never built a Real Space model before, but I was intrigued by this model. I liked the characteristic Soviet appearance of the strap-on boosters, and the large clean resin castings tempted me as soon as I opened the box. Construction starts with preparation of the resin parts. The large parts are attached to correspondingly large casting blocks. A razor saw is the appropriate tool for this job. I took plenty of time to ensure a straight cut because the base plate for each booster and the main rocket require a perfectly flat surface for a gap-free bond. When the blocks were removed, I sanded the bottom of the parts in preparation for the base plates. Smaller parts can be removed from their casting blocks with a hobby knife and cleaned up with a sanding stick, but care will be required with a few items. In particular, the "V" shaped interstage parts need to be handled with care. I nibbled away the majority of the resin flash between the arms of each "V" with a set of sprue cutters, then finished the preparation with a new knife blade. Although there was an impressive pile of waste resin following cleanup, the entire preparation took no more than an hour and a half. Assembly proceeded quickly once the parts were prepared. The base plates were glued to the bottom of the main rocket body and to each of the boosters. I drilled out individual holes for each of the separate small nozzles and glued them in place. In retrospect, I should have waited until the boosters were glued to the body before securing the small nozzles. That way, I could have adjusted the precise height of each nozzle to ensure they all touched the ground when the rocket was in the vertical position. |
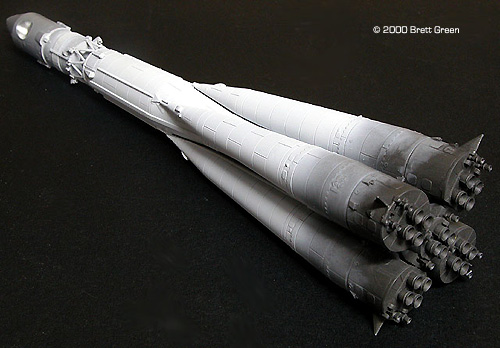
Attaching the boosters and threading the interleaving straps is probably the most challenging aspect of construction. The instructions suggest that the boosters should be glued in place then the straps threaded between the boosters and the body. This method seemed to offer little margin for error. I therefore decided on the following process:
This might sound complicated but it should make sense when the parts are laid out in front of you. The image below shows the rods and boosters with Step 3 (above) completed, ready for threading and final assembly: |
|
![[Strapping]](vostokreviewbg_08_.jpg)
|
The Vostok third stage parts were glued together. A few gaps were filled with Liquid Paper and Gunze Mr Surfacer before being sanded.
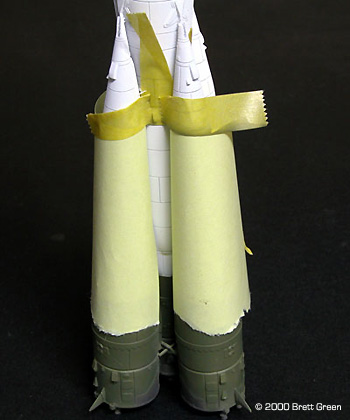
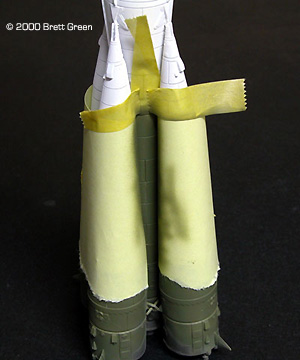
The next demanding task is the alignment and installation of the "V" interstage supports. These are supplied as two semi-circular halves. A spare semi-circle is also provided in case of disaster. Locating holes are recessed into the top of the main body, so I decided to install the two delicate resin parts here first. The "V" supports rested nicely on top of the locating holes and against each other. It was only after I had glued the third stage on top of this assembly that I noticed that it was slightly crooked. I tried to avoid dismantling the entire assembly by trimming a couple of the legs of the "V" supports while they were glued in place. This was working well until I popped the third stage off the body of the rocket while sanding on of the mounts. I took this as an omen and made a more meaningful correction, this time adding the "V" struts to the bottom of the third stage and sanding the bottom of the struts until they were flat. A spot of super glue on the bottom of each "V" secured the third stage to the body of the rocket. Assembly was completed with the addition of small vents on the upper part of the main rocket. Painting Prior to building the Cutting Edge model, I had precious little knowledge of Vostok and no idea about colour schemes. I did a quick search on the Internet and found a website with a great colour photo of a Vostok in a finish of green and white. You can visit the web page by following this link. That looked good enough to me! I had a couple of options for the sequence of painting. It would be easiest to pre-paint the parts before final assembly, but the painted parts would nevitably suffer from fingerprints and super glue marks before completion. On the other hand, complex masking might be required if I decided to paint the model after assembly. In the end, masking seemed to be the lesser of the two evils. The white in the photograph appears to be dead flat. I first sprayed the body of the model Flat White, and then sprayed Testor's Burnt Metal Buffing Metalizer on the base of the Vostok. Tamiya Masking Tape was used to define the border between the white and the green. I chose Green FS 34102 as the second colour. This displays a noticeable sheen in the photo. A small section of the Sharik re-entry sphere is exposed at the top of the third stage. This circle was sprayed with Aluminum Metalizer then masked with a blob of Blu-Tack. The reference photo also shows an irregular white band part way up the third stage. I assume this is actually icing, not paint, but I wanted to depict it too. I masked a hard line at the bottom of the band, but applied a soft demarcation at the top. I also airbrushed a streaky band of green inside the white band per the photo. I originally intended to mask the metallic paint at the base of the rocket too, but I got a nice sharp demarcation line by freehand spraying. After the green paint had been applied to the top of the rocket and the bottom of the boosters, I stuck self-adhesive "Post-It Notes" to the boosters to mask them in preparation for spraying the green sections of the lower main body. This resulted in a clean demarcation line for both the main body and the boosters. The Blu-Tack mask for the silver circle was removed and the tips of the booster mounts were brush-painted with Burnt Metal Metalizer. Finally, a thin black oil wash was applied to the surface details on the green parts of the rocket. The white parts did not require any additional highlighting - the crisp recessed detail looked good as it was. I have since been told that the large white sections are actually ice from frozen fuel. I was surprised that the areas of icing were so large and so uniform. Well, now I have a Vostok with ice painted on, I will have to build a launch pad for a diorama! |
Image: Another perspective Image: The central part of the model was painted Flat White and the base sprayed with Burnt Metal Buffing Metalizer (Testors paints) Image: Green was sprayed on the bottom of the boosters and the top of the rocket. Following this, "Post It Note" masks were stuck to the booster. Image: Green was then sprayed on the main body between the boosters...
|
|
Conclusion Cutting Edge has applied the same high production standards to their first "Lift Off" subject that we have seen in their many resin aircraft accessories. It is well detailed, sensibly planned for assembly and beautifully cast. The 1/144 scale Vostok went together fast. The model was prepared, assembled and painted between midday on one day and 6pm on the next. I probably spent 1˝ hours on cleanup, 2-3 hours on alignment and assembly and another 3 hours painting the rocket. With more time and the benefit of hindsight I could have achieved a more precise result in areas like the small nozzles and the alignment of the straps, but I am quite happy with the result. The speed of assembly does not necessarily reflect the degree of difficulty. I would not call this an easy kit. However, modellers with some experience working with resin kits and accessories will not encounter too many surprises. Now maybe I should take another look at some of those science fiction kits I have stashed away... |
|
| |
|
|
![]()
This page copyright © 2002 Starship Modeler™. Last updated on 8 November 2002.
Text and images originally appeared on HyperScale and are reprinted with their kind permission.
![[Click to enlarge]](vostokreviewbg_03.jpg)
![[Click to enlarge]](vostokreviewbg_06.jpg)
![[Click to enlarge]](vostokreviewbg_09.jpg)
![[Click to enlarge]](vostokreviewbg_12.jpg)
![[Click to enlarge]](vostokreviewbg_15.jpg)
![[Click to enlarge]](vostokreviewbg_18.jpg)
![[Click to enlarge]](vostokreviewbg_22.jpg)
![[Click to enlarge]](vostokreviewbg_25.jpg)
![[Click to enlarge]](vostokreviewbg_28.jpg)
![[Click to enlarge]](vostokreviewbg_27.jpg)