
|
The projects in this section are presented as step-by-step journals. Our intent is to delve deeper into the nuts and bolts of constructing and finishing a particular project while giving a sense of how long it takes. The subjects will range from simple kits to complex dioramas and everything in between. Authors will range in skill level, and include hobbyists and professionals. If you have a project you would like to share here, please drop us a line to discuss it. |
|
| Star Trek® Romulan Bird of Prey |
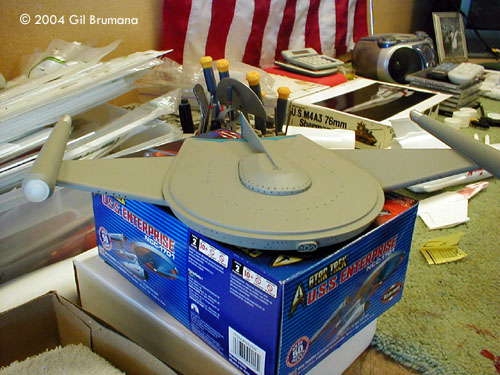
![[Prepare to fire...]](gb_bop/09_365.jpg) Project type: Kit with electronic components by Gil Brumana - images & text © 2004 I am involved right now with a group of fans of Star Trek that is trying to make an original short film based in the TOS era. We are in the very early stages of pre-production, but some of the ship designs and such have been finalized, and this is one. The story calls for two Romulan Birds Of Prey as escort for a larger, completely orignial design Romulan Cruiser. The model built here will be filmed to represent the two BOPs. |
|
|
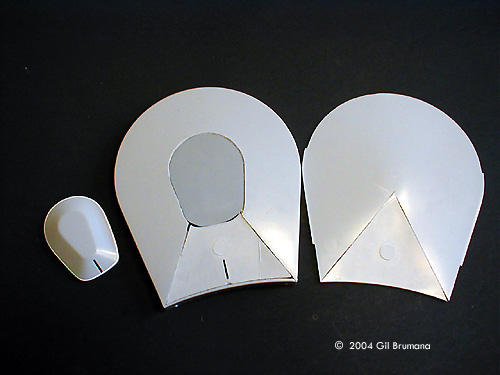
Day 1 Since the model did not need to be very large, (as apposed to the two other miniatures) I decied to start with the old AMT BOP. These are getting very hard to find, as AMT only issued them once and did not include them in the reissue of the Star Trek kits that came out some time in the late 80's (I think). I found this one on eBay for...... $100.00.... (ouch! the wallet) the budget for the FX took a little jump here. It's is an expensive kit (now) and mistakes could be costly - there was several I had to repair along the way that were difficult because the plastic was so old and brittle. To start, I cleaned all the parts of sprue and remaining plastic. I discarded the parts that are not needed. This is the worst representaion that AMT did of any of the Trek ships, and the tail fin and the balls for the nacelles are completely wrong and would have to be replaced. |
|
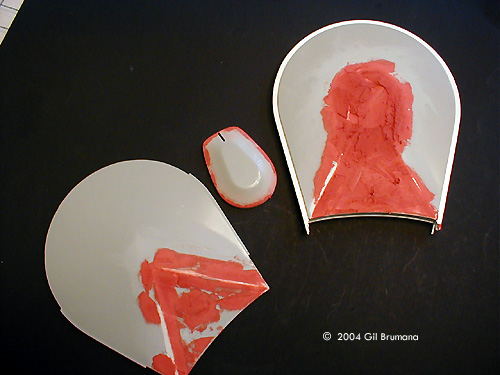
After this I laid out the parts and decided where the wiring would be run for the lighting. Once this was done I started on the task of correcting as much of the overall shape as could be corrected. The bridge section is too tall and wide, so I cut if from the hull. Also, the model does not have the distinctive concave scallops at the rear of the upper and lower hull that were found on the original model. So the triangular shapes were cut out of the hull, and turned over and glued back on to form the concave sections. This was then smeared with auto body glazing putty to fill in the seams. Since this putty would take a little time to cure, this ended the first day's efforts. Time spent: about 5 hours. |
|
|
Image: ... using strip styrene. |
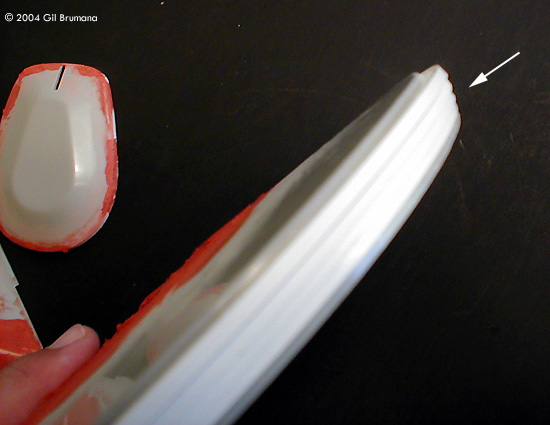
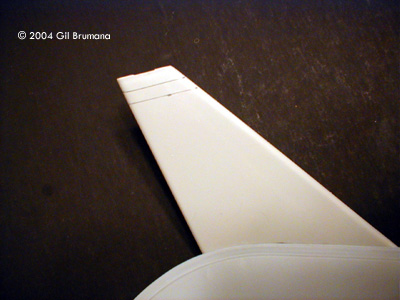
Day 2 Today I cut the bridge down and added a new lip around the bottom so it would fit to the hull. It is now closer to the proper height and width. I puttied this, then turned to sanding down the hull halves where I had puttied. After this, I reapplied putty where needed and turned my attention to the secound big problem of this model.... the straight up-and-down sides of the hull (what was AMT thinking when they mastered this?). The original fiming model had a lip around the hull and slanted sides. To recreate this, I used a fellow modeler's technique that I saw on Culttvman's site. I built up stepped layers of strip styrene to the desired angle and depth. This was then covered with 020 sheet styrene and trimmed and sanded, then puttied, then sanded, then puttied, then sanded....... there was alot of sanding done to this model. |
|
(Thanks have to go to Jay Dennis for the technique for building up the hull sides). Total time for today was 7 hours. |
|
|
|
Day 3 The sanding and reputtying took another day. The result was the bottom of the hull being finished and primed. The top hull needed even more sanding and putty. I also managed to build the lip inside the hull for the bridge section to fit down onto. Another 7 hours were spent on this activity today. |
|
|
|
|
Image: Nacelle halves prepared for lighting |
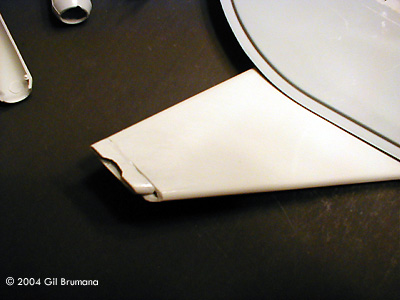
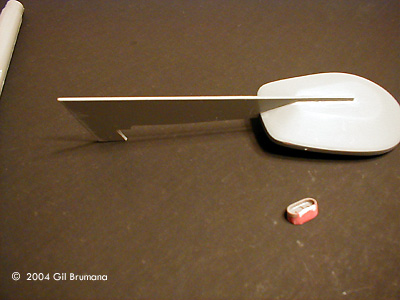
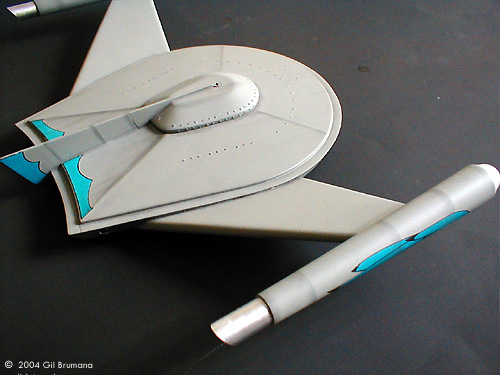
Day 4 Today I worked on the wings. I notched out both ends of all four halves for the wires, then glued the halves together. After the cement had cured, I sanded the seam line then attached the wings to the upper hull with cryo glue. I then took the nacelles and cut open the indentation that lets them sit on the wings. This, also, is for the wiring to pass through. Next, I carefully opened up the front of the nacelles for the lighting effect. I threw the dumb ball-shaped pieces that AMT wanted to be put there into the scrap box. They should be good for something. After test-fitting the nacelles to the wings, I noted that the wings are far too long. I solved this by removing half an inch from the tips. I used the nacelles as guides, marked how far they fit over the wing tips, then measured one half inch down from there and removed the section inbetween. Then I glued the tip back onto the now shortened wing as a mount for the nacelles. |
|
That's it for day four. Time spent: 7 hours. |
|
|
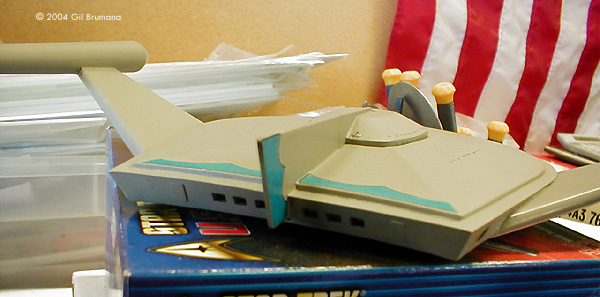
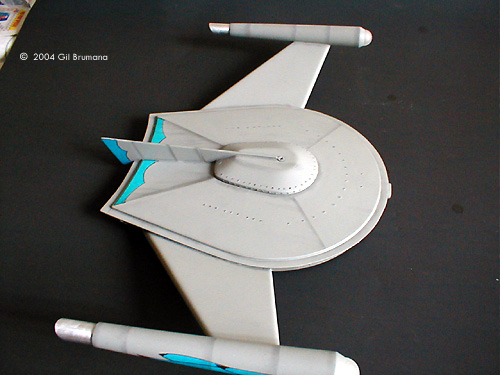
Image: New fin and plasma emitter |
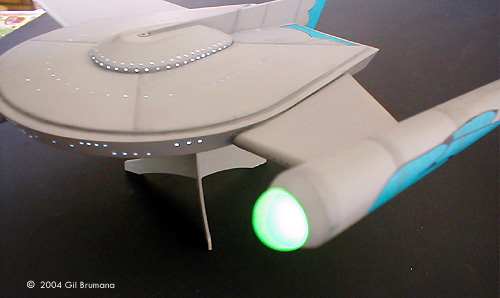
Day 5 I started Day 5 by making some of the smaller pieces of the model. The new center fin was made from .060 sheet styrene. The plasma weapon emitter was made up from scrap pieces and styrene tubing. The fin would later have to be cut, just behind the bridge, for fit and esthetics. I then used my Dremel and cut thru the back of the model to make the six impulse engines that are characteristic of the BoP (thought I don't think the original model ever had them but they look good). I also added little pieces of styrene to represent the airlock doors. Next came the lighting and power system. |
|
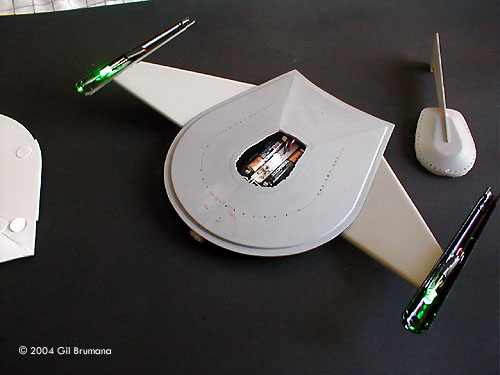
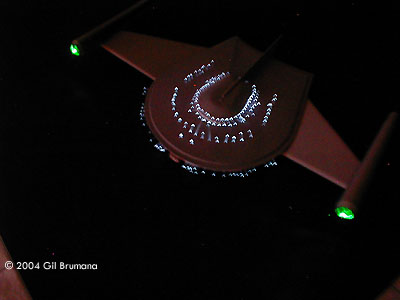
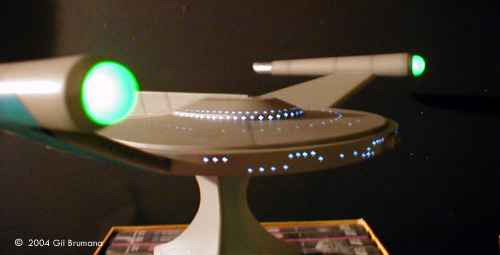
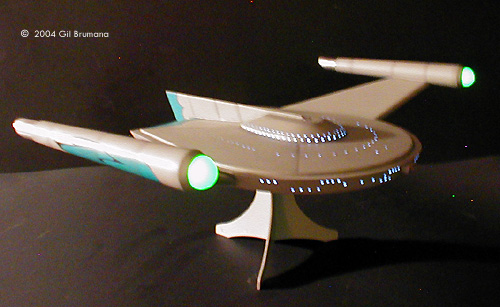
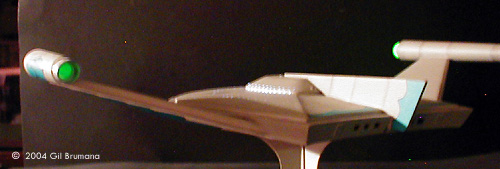
This will probably sound exceedingly silly, but the power and light source is a bicycle tail light that you can buy in any bike shop. These are great for small projects like this. You do still need a basic knowledge of electronics though, so you can change the LEDs to what you need and so forth, but the little circut boards are a great start. Plus, I like to keep systems completely internal as much as I can. I reworked the circut board with four superbright white LEDs in two of the terminals, and wire leads in two others. I positioned the main body of the board so it would be accesable from the removed bridge section, (for changing batteries) and superglued it to the bottom hull. After painting the inside of the hull gloss white, of course. I then ran the wires through the wings for the warp engines, soldered super bright green LEDs to the ends of these and bent the wires so the LEDs would face the front of the nacelles. The next step was to drill, (by hand not machine because the plastic was too brittle) all of the sensor and window holes. I got the bridge done before I had to quit for the day -- there were 76 holes in all just for that (my eyes and fingers hurt right now.....) That's the end of day five. Total time spent today was 9 hours. |
|
|
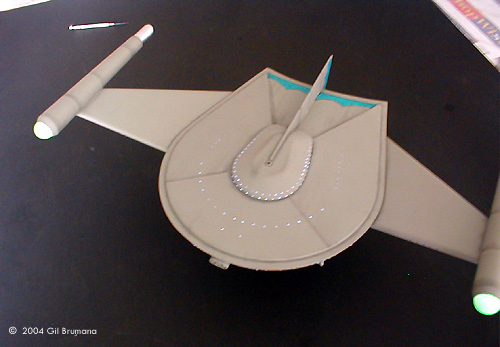
Image: Test fit |
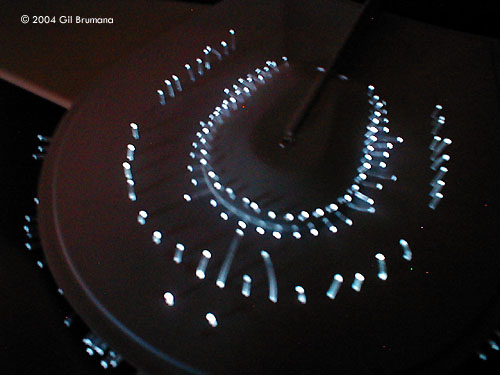
Day 6 I finished up drilling the holes in the hull.....80 for this part. Then I took a break to rub my hand back to life. After circulation in my hand was flowing again, I started to insert the fiber optic strands. I bent and placed them so that the ends on the inside would be as close as possible to the LED light sources. This, plus the gloss white paint bouncing the light around, will make sure the fibers pick up light from everywhere inside the hull. The fiber optic lines were left overly long on the outsideso they could be trimmed off after painting. As you can see in the picture..... that's alot of fiber optics. Next was to put the hull together, (not glued, just set together) for a lighting test. Lighting test....Check. |
|
Every thing was working fine so I buttoned up the hull parts using superglue. I glued the nacelle bottom halves to the wings then closed them up with the top halves, and started to putty up all the seams. The putty would need at least the night to set before I could sand it...so... now was a perfect time to get a real lighting check with all the fiber optics in place and the model bascially all together. Total time spent today: 9 hours. |
|
|
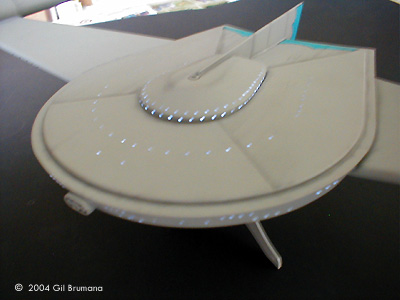
Image: Fiber optics trimmed back, upper hull |
Day 7 I primed, spot puttied, and primed again till everything was smooth. Then I painted the ship Dove Gray overall, with Antique White used for the back half of the bottom of the model. (the original studio model was painted the same way). It was the put up to dry for the day. After this had dried, the stubs of fiber optics were cut flush with the hull with a parts snipper. New decals from JBOT were used for the Bird Of Prey on the bottom. In this case, a blue one to represent a different part of the Romulan Fleet then we have seen before. Putting on the decals took a whole day due to the size of the decals and the tediousness in getting them placed while still wet. Decals for the landing pads are included in the JBOT decal sheet. These will be used as guides for scribing in the pads later. |
|
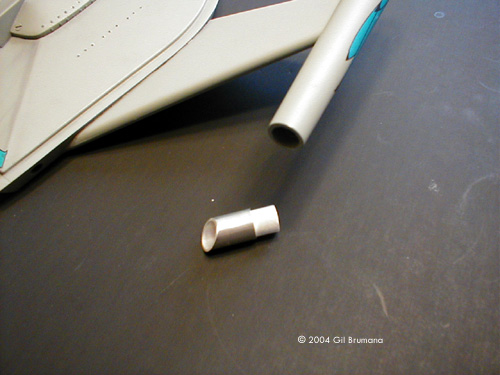
I used frosted 9/16" diameter hemispheres for the ends of the nacelles. The nacelle exausts tips that I made out of aluminum tubing. They are much more realistic then the models parts. Total time for these two days.... 8 hours a piece. Next up will be the weathering. |
|
|
Image: Warp nacelle |
Day 9 Today was the weathering, which was done to the model using pastel chalk, low tack tape and brushes. Panel lines were done with the tape. Since this is from the TOS era I tried to keep paneling to a minimum, in keeping with the look of the original miniatures. The pastels were then sealed with Lusterless Flat Clearcoat. The only thing left then was a final light check..... The last day was a short one.... time spent.... about 4 hours. This was a satisfying build-up (if a little teadious at times) The model should look great on film. |
![[[Star Trek models & more at the Starship Modeler Store]]](http://www.starshipmodeler.com/resource/trek_ad_1.jpg) |
| Visit our sponsors! | Advertise with us |
![]()
This page copyright © 2004-2005 Starship Modeler™. Last updated on 10 January 2005.
![[Box]](gb_bop/01_336.jpg)
![[Click to enlarge]](gb_bop/02_41.jpg)
![[Click to enlarge]](gb_bop/03_40.jpg)
![[Click to enlarge]](gb_bop/04_342.jpg)
![[Click to enlarge]](gb_bop/05_348.jpg)
![[Click to enlarge]](gb_bop/06_349.jpg)
![[Click to enlarge]](gb_bop/07_353.jpg)
![[Click to enlarge]](gb_bop/09_356.jpg)