
|
The projects in this section are presented as step-by-step journals. Our intent is to delve deeper into the nuts and bolts of constructing and finishing a particular project while giving a sense of how long it takes. The subjects will range from simple kits to complex dioramas and everything in between. Authors will range in skill level, and include hobbyists and professionals. If you have a project you would like to share here, please drop us a line to discuss it. |
|
| Nautilus |
|
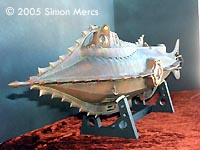
![[Click to enlarge]](sm_naut/13_02.jpg) |
Project type: Multimedia kit
by Simon Mercs - images & text © 2005 This is a straightforward (I hope!) build of a large, limited run resin kit. |
|
Day 13 |
|
|
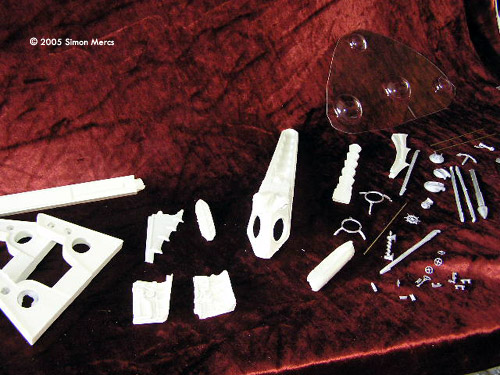
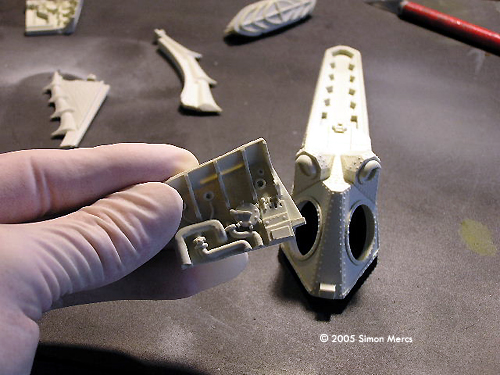
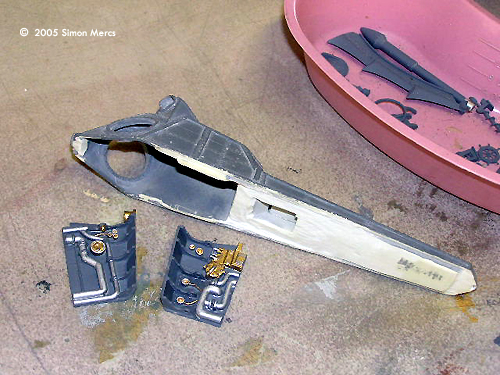
Image: The mit includes many resin detail pieces, clear vacuform styrene |
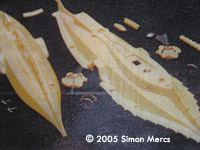
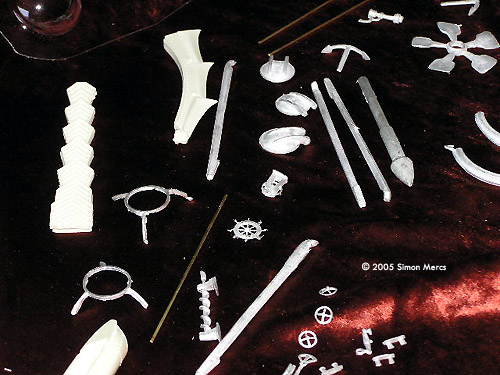
Day 1 Homework stage: this is when I take a look at historical documentation on the real item, if it exists, and the Nautilus did. Today I am poring over some actual pics of the real Nautilus and its expedition to the Pole. The kit is a 32 inch resin cast version of the Disney Sub. It should be a fairly straightforward assembly as I am not commissioned to light this one, too bad! All parts are laid out for inspection while I plan tomorrow's moves. |
|
|
|
|
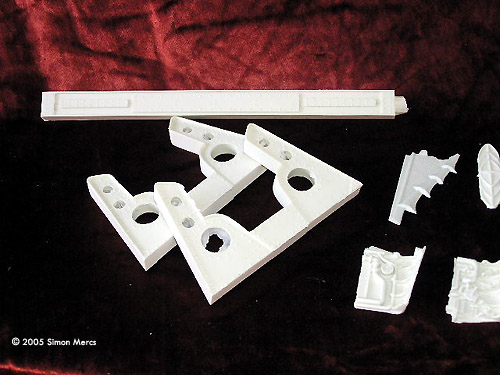
Image: Bench-mounted vices and heavy clamps keep the pieces together while the glue sets up. |
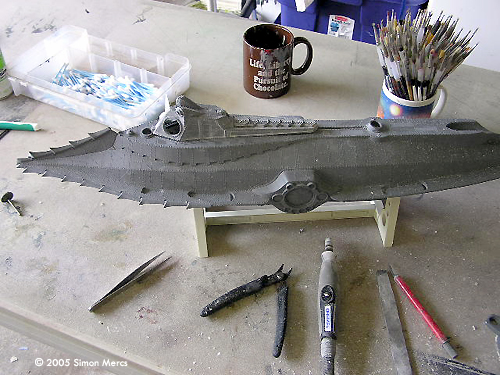
Day 2 Today I begin with the large sections that comprise the main hull sections. Several clamps are used wile the glue sets to get a good clean join. While that is setting up, I have a lot of sanding and prepping to be done on all the metal and resin parts in this kit. Once the glue has cured on the hull I apply the first of many thin primer coats. |
|
|
|
|
Image: Mold seams and flash are cleaned off the metal pices Image: Parts soaked in thinner and then scrubbed with a toothbrush for good measure. Image: Cleaning up the stern Image: The stand makes a good .... well, stand. |
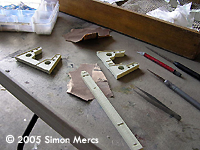
Day 3 Today the stand is assembled as it is a good base to work on the rest of the sections of this build. Next, all parts are trimmed and finally cleaned off. Paint will not stick if you don't prep the parts first. Acetone or paint thinner is a good cleaner for the mold release and other residues on all parts. The pictures show the simple process. Do this in a well ventilated area. |
|
|
|
|
Image: The exterior of the wheelhouse |
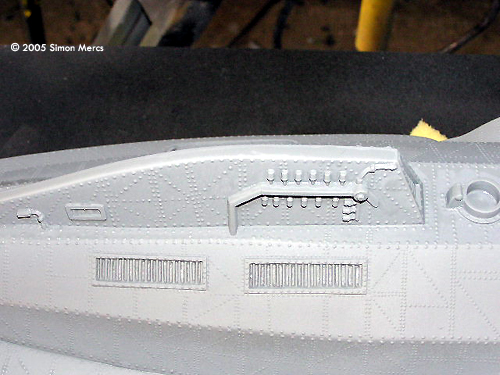
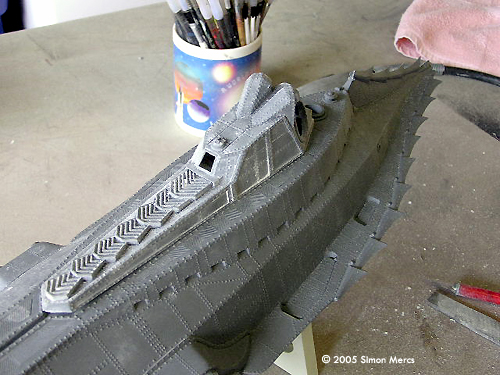
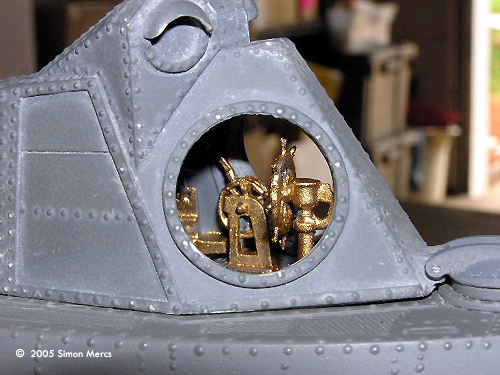
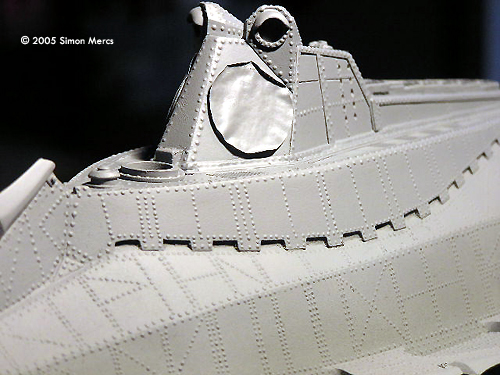
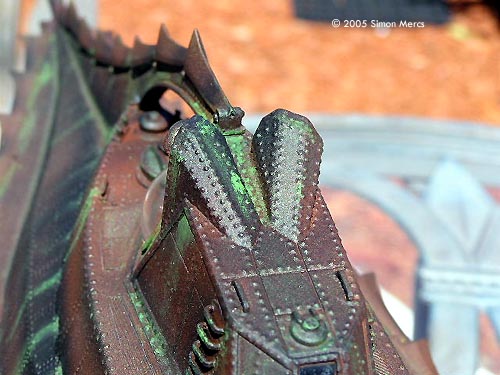
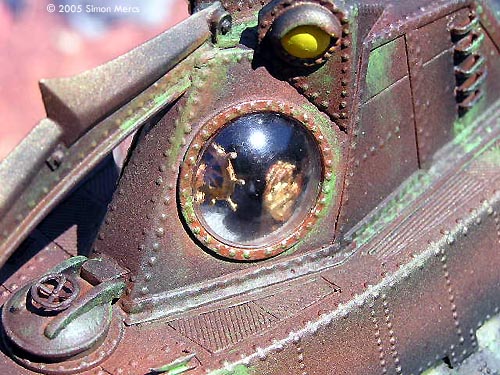
Day 4 Today I begin the "WheelHouse" section of the build. This is the primary detail of the kit. The interior is seen through the bubble portholes and is highly detailed. All parts were first primed to allow for good paint adhesion and an even texture. The "WheelHouse" fits pretty well but requires a bit of refinement. The first detail paint is done on the inside walls of the "Wheel House". I'm using print-outs of archive material to help me with the color scheme. After priming and painting, I leave all today's work under the drying lamps. |
|
|
|
|
Image: The bulkhead details go inside the wheelhose structure |
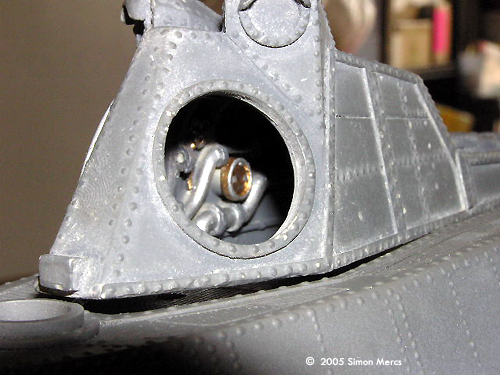
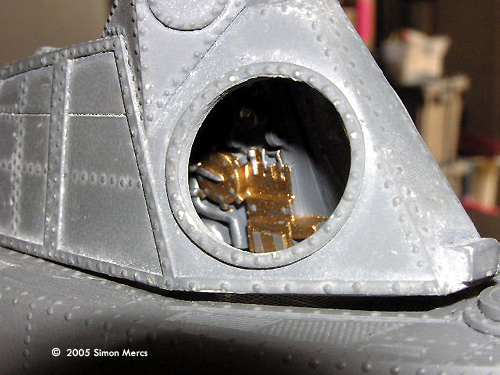
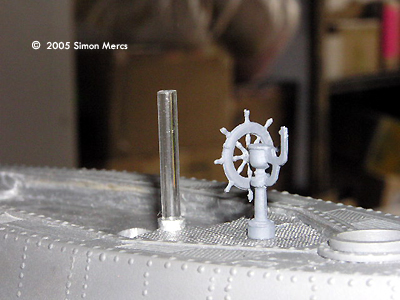
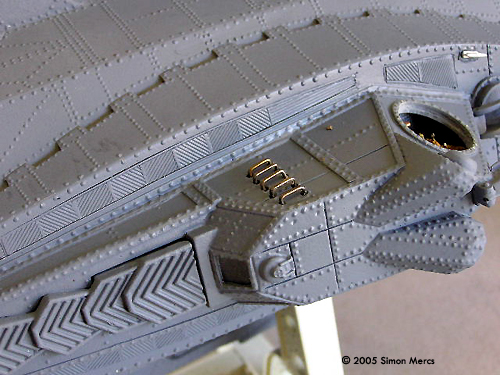
Day 5 Wheel House assembly work continues with the attaching of inside wall panels. The tiny steering and speed controls are put into place and then detail painted. These tiny parts require patience to place and paint. Tiny tarnish details are added to give the look of brass dulled by exposure to sea air. The ballast flow tube is cut from a clear plastic tube, and a blue gel strip is put into it to give the illusion of sea water. The hatch in front of the wheel house is placed to give a placement lock on the front of the wheel house "canopy". Lastly, the deck of the cabin is painted in deck steel color. |
|
|
|
|
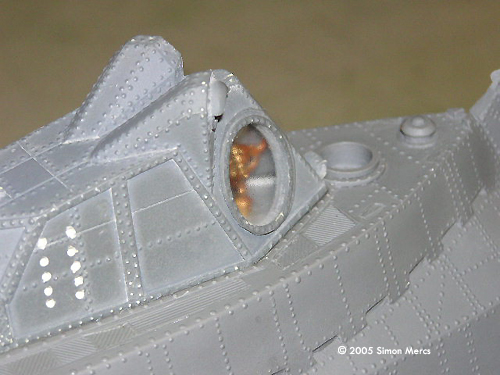
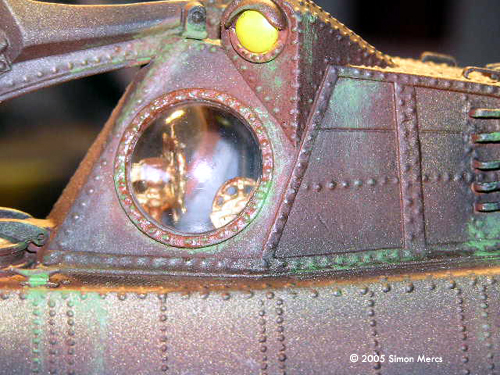
Image: The rear clear piece is very carefully installed |
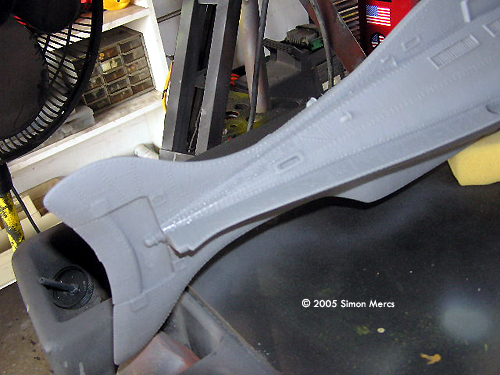
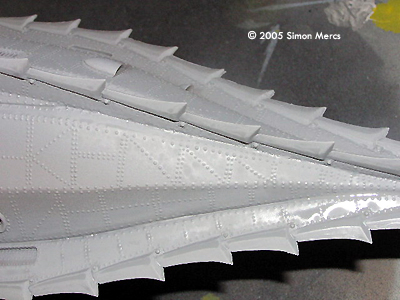
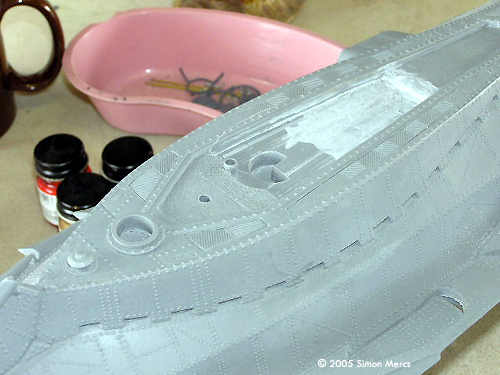
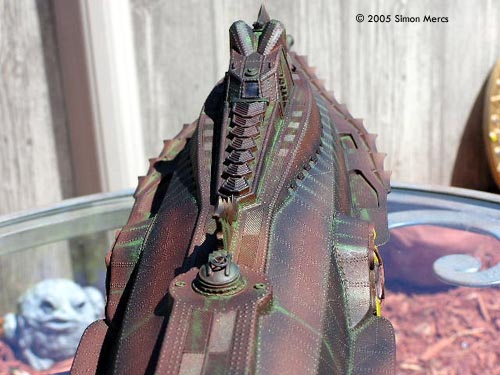
Day 6 The external details like the glass section on the rear of the wheel house are tackled today. This takes a little thought and a cotton swab to assist me. Using clear epoxy resin as a 'glue' I get a nice strong bond, and no streaks on the "glass". The wheel house canopy is finally glued onto the hull section and the porthole openings masked off to prevent the internal details from being messed up. The entire sub is once again primed in gray to unify the top and bottom section, and fill seams that would ruin the clean lines at the meeting point. I also have to be careful not to mess up the many "rivet" details that make up the entire exterior of this great kit. Limited sanding and very careful glue application are the order of the day throughout this construction. |
|
|
|
|
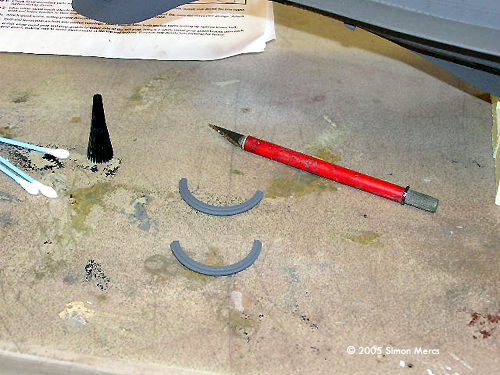
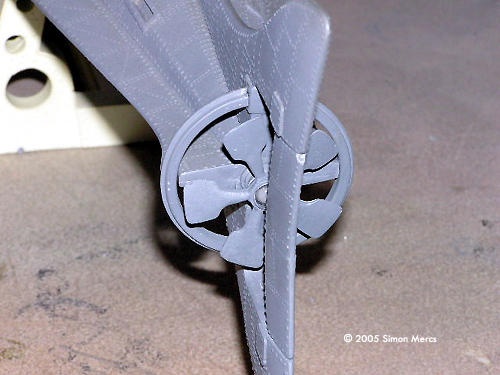
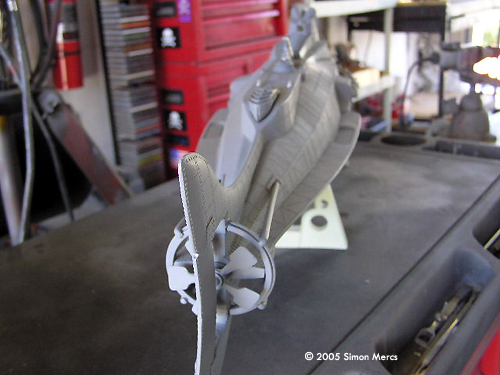
Image: Superglue smoothes out the screw hub |
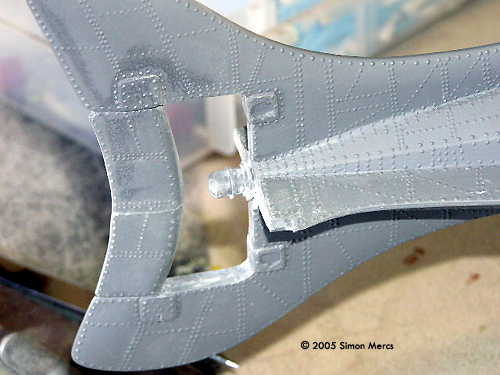
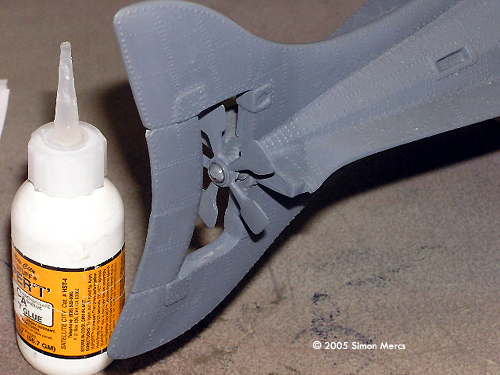
Day 7 Short day today. I spent the time I had attaching the screw to the rear section, and then building the caged strut section that surrounds it. These are all metal parts and require some bending to get the alignment correct. I gathered a lot of reference material to get a good idea at the angle and location of these parts.Once the details are etched out correctly, I proceed to prime this area and blend it in with the rest as before. |
|
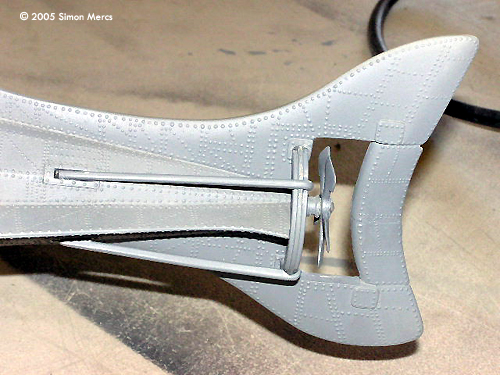
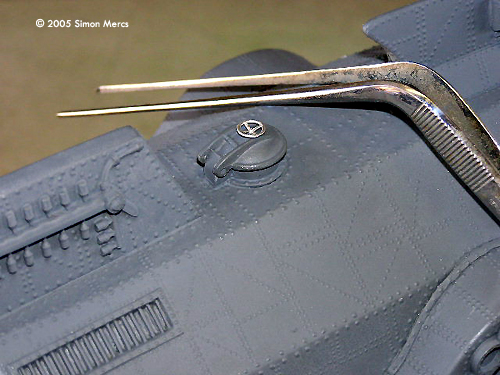
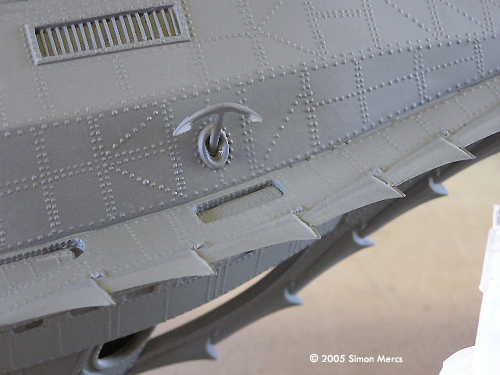
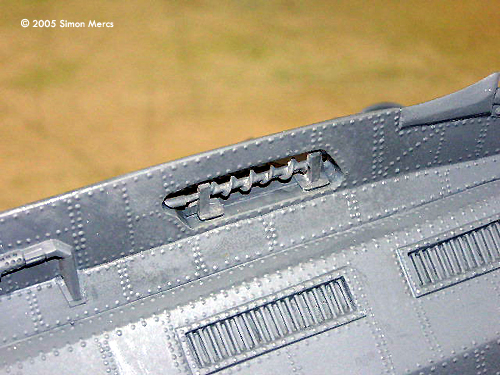
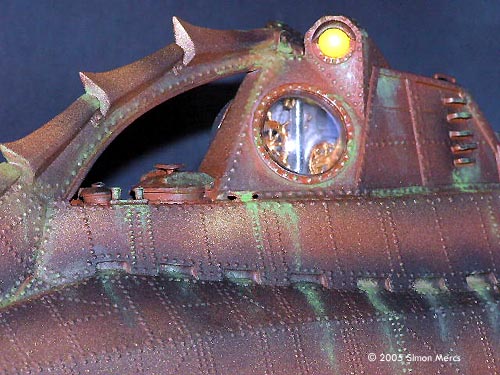
Image: A hatch here .... |
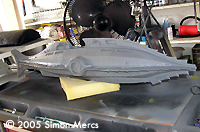
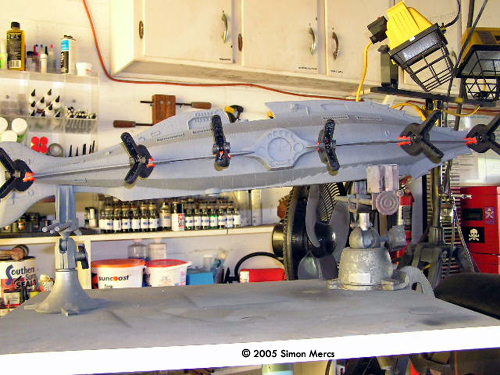
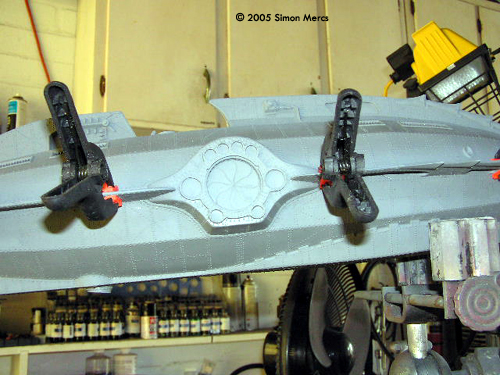
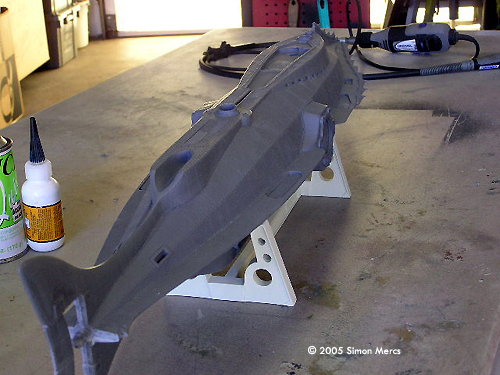
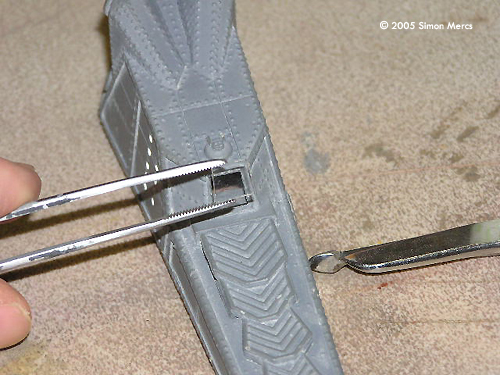
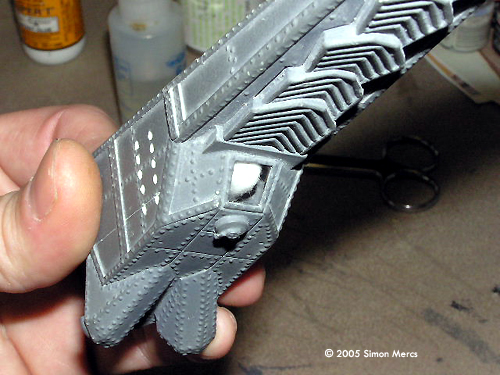
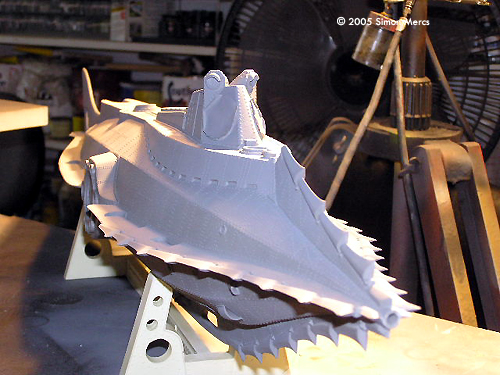
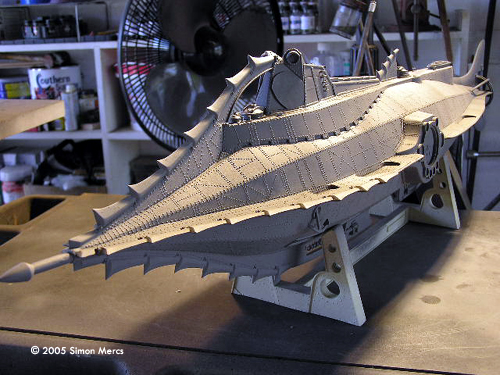
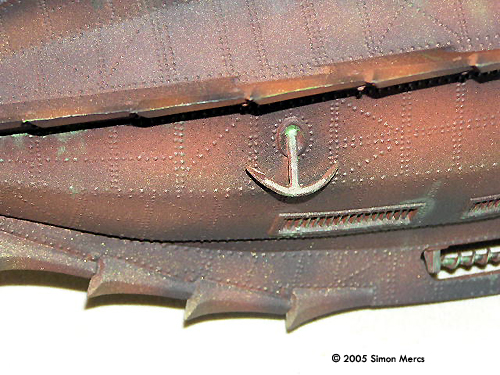
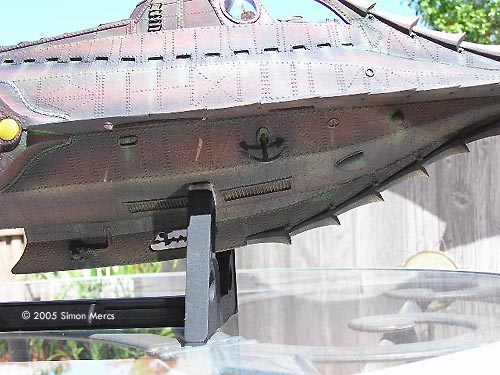
Day 8 A lot of work accomplished today! Hull structures, hatches, anchors, dorsal fin, forward fin, ffeboat and many other detail metal and resin parts are attached and primered. The Nautilus is really starting to take its familiar shape! This is a slow and careful stage as the large size makes carefull handling a must. Grab at the wrong place and the last hours work is crushed or knocked off. The stand is very useful in the assembly process, as it is a sturdy design and holds the weight without any problems. |
|
|
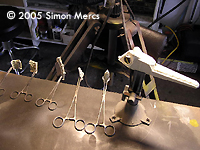
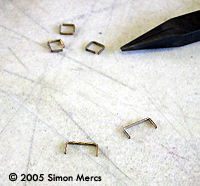
Day 9 One of the most time consuming parts of the build was the ladder outside the wheel house. The supplied parts are thick brass rods that didn't look in scale to me at all. I substituted small upholstery staples that were much closer to the right size and shape. Careful bending of these parts and cutting finely to get the right span, the ladder began to take shape. The holes for the rungs were filled after insertion and primer was applied to unify all once again. This is more difficult than it looks and I spent a lot of time on it. |
|
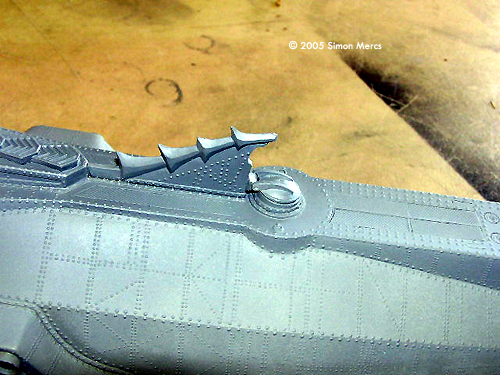
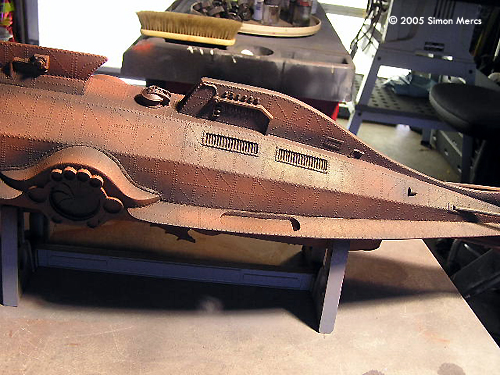
Image: Rust |
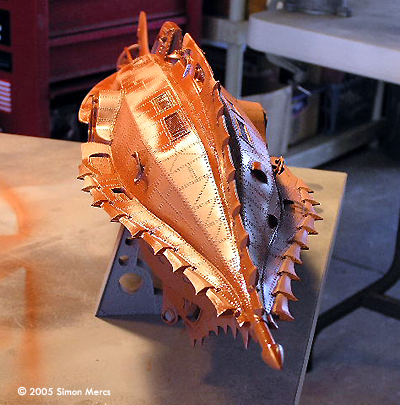
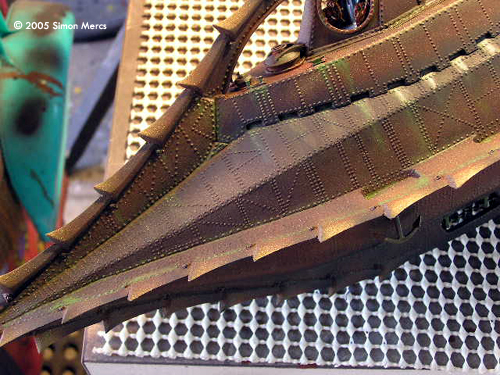
Day 10 Today I apply the first of many color coats to the exterior hull of the Nautilus. Most builds I have seen limit this to a Rust or Dark Tarnished Brass color. I wanted mine to be a bit more complex and have some serious sea weathering effects. First the Rust was applied as a base color. Then some Gold accents were painted on several areas where the real prop had shiny Brass showing through from friction on the high sea. Then, I went into it with various dark shades of Flat Black, and Dark Iron to really start bringing out the various shades of a large metal structure with many weathered parts. You can see how the Dark colors start to merge with the sprouting of Brass colors here and there. All is allowed to dry overnight. |
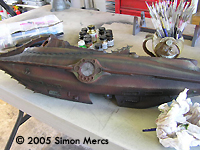
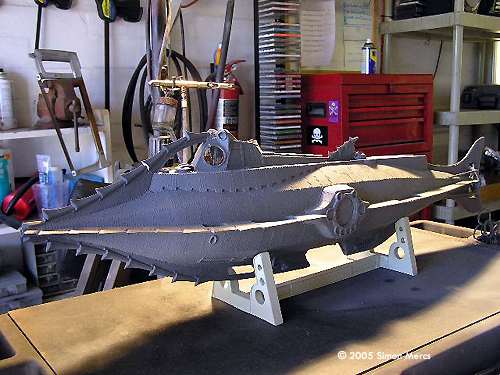
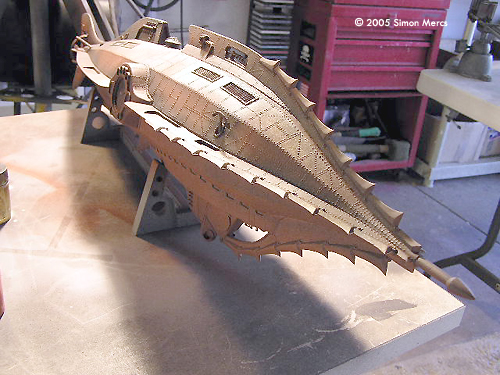
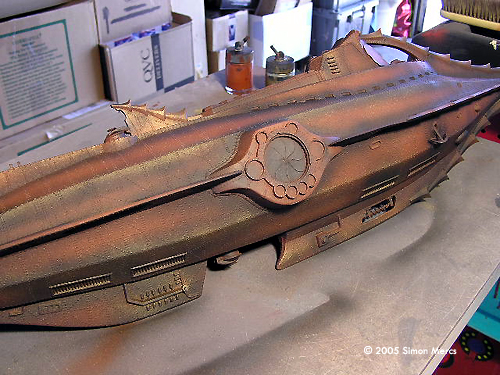
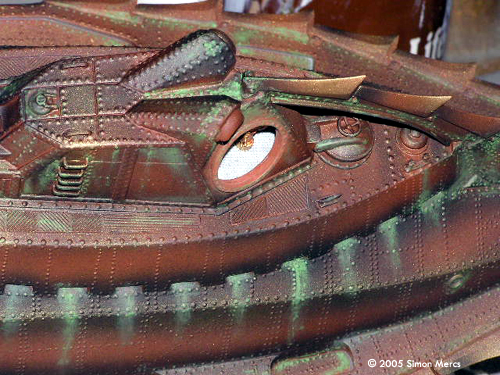
Image: Midships |
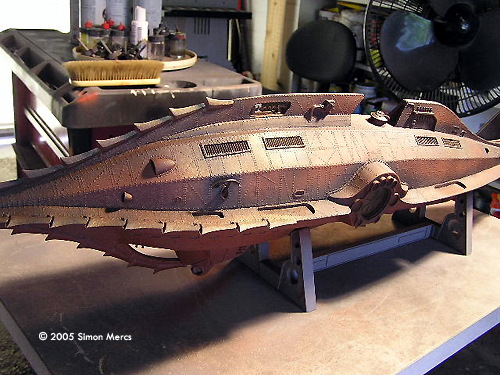
Day 11 More weathering, now moving on to the algae effects I remember from the ride at Disney World. I always thought that made the sub look really cool! You can see various sections being done in this style. The idea is built-up algae on the hull, in nooks and crannies, around grilles and hatches, running out of ballast tanks, and lots of other places you would expect to see this growth. This is all done with dry-brushing, and if done right, gives great looking results. Not too much, but part of the overall look of our model. |
|
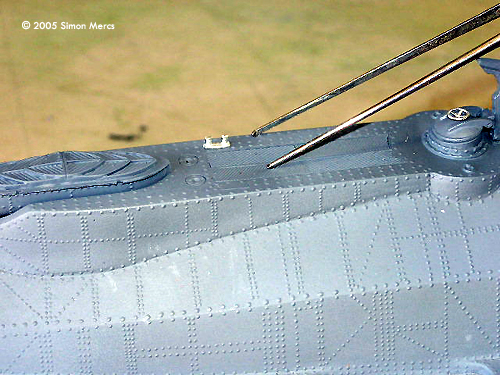
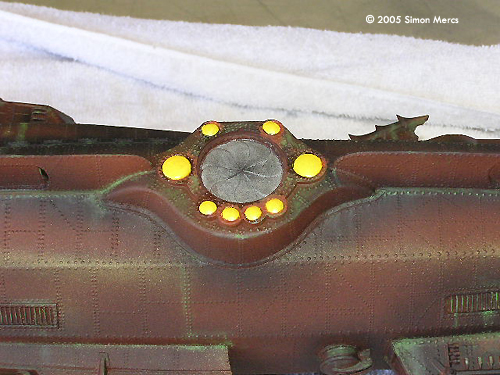
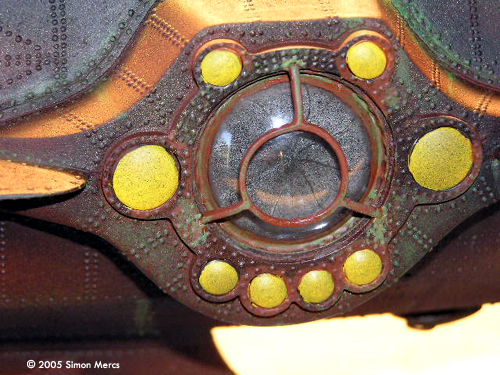
Image: Placing the clear 'bubbles' |
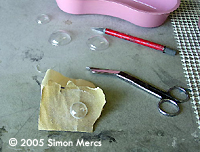
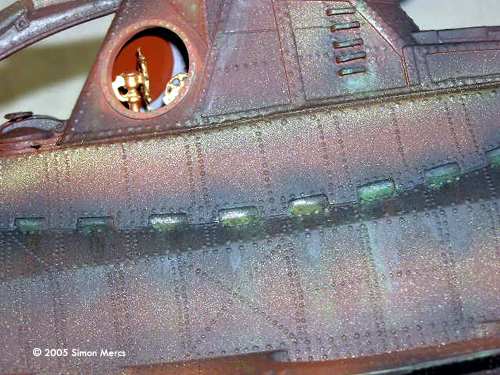
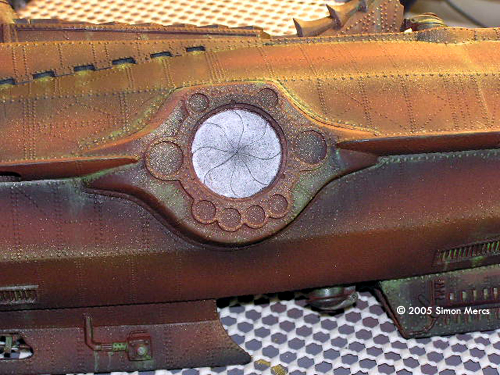
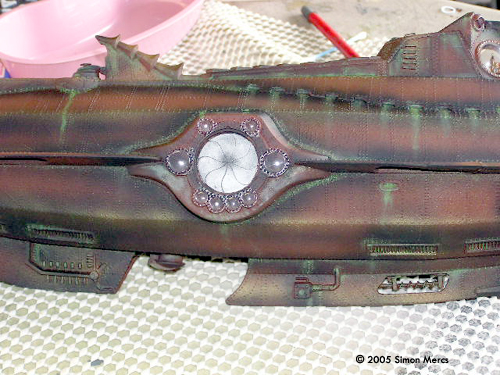
Day 12 Some of the last parts are applied today. All those little round bubble domes and the larger ones are placed carefully after being cut to fit. This takes patience and a lot of slicing and dicing. I cut myself a few times with the exacto, but nothing worth doing is easy. Some are painted yellow to simulate lighting, others left clear. The salon iris is closed on this kit, so I built up a nice algae effect around this to give it an authentic look. All remaining touches are finished up and allowed to dry under the heat lamps. Tomorrow, final beauty shots! |
|
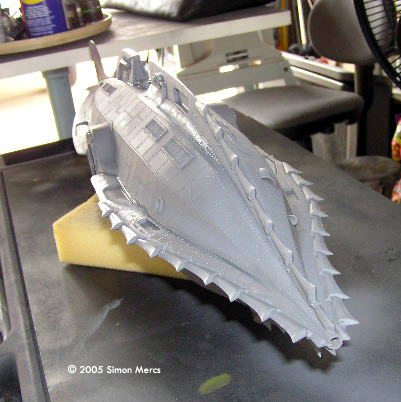
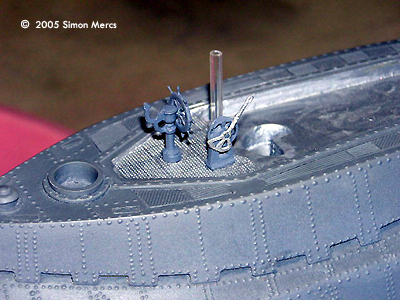
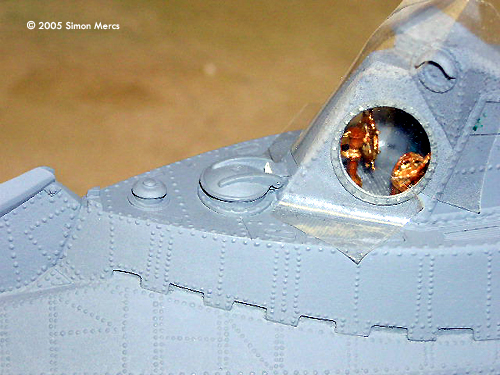
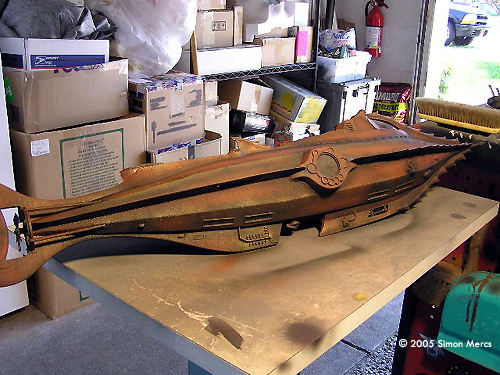
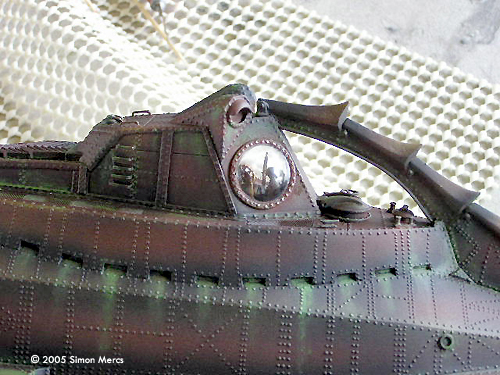
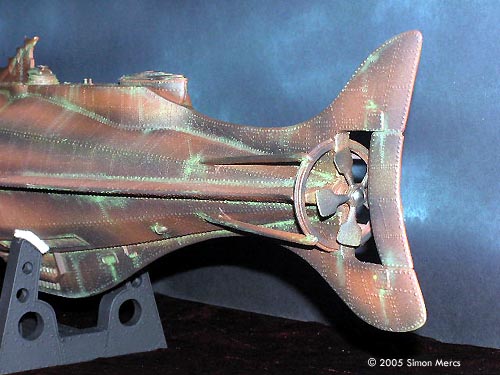
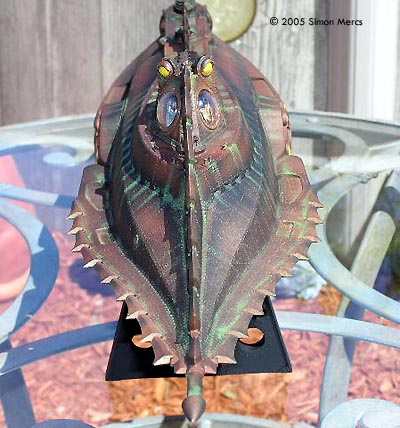
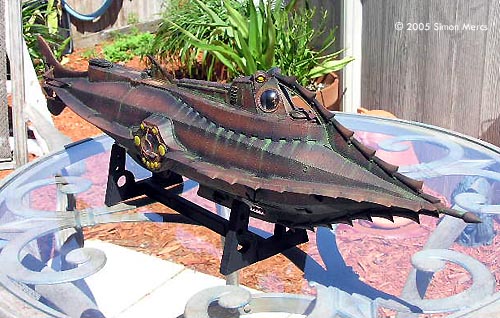
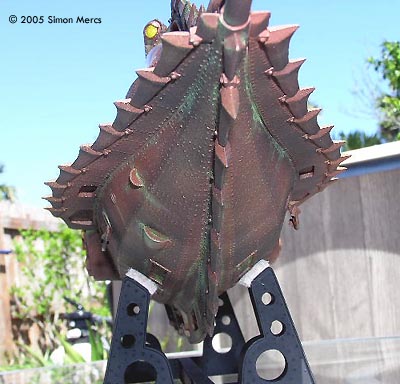
Image: Port side |
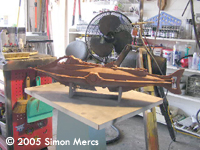
Day 13 After a last look over to make sure I didn't miss anything, I take some pictures of the model inside and outside where the colors really come to life. At 32 inches (nearly 1 meter) long, this is an impressive piece. It's going to a doctor's office in their lobby, in a presentation case. I hope you enjoyed this one! |
![[List your model events on SSM]](http://www.starshipmodeler.com/resource/sm_events.gif ) |
| Visit our sponsors! | Advertise with us |
![]()
This page copyright © 2005 Starship Modeler™. Last updated on 27 October 2005.
![[Licensed to drill]](sm_naut/05_01.JPG)
![[Click to enlarge]](sm_naut/06_01.jpg)
![[Click to enlarge]](sm_naut/07_01.jpg)
![[Click to enlarge]](sm_naut/08_01.jpg)